How to Face Swap on Zoom: Use a Live AI Face on Video Calls
How to face swap on Zoom, step by step: send a live AI face to the LiveSwapFace virtual camera, select it in Zoom and fix the usual camera settings.
Zoom has built-in Avatars and Studio Effects for animal masks, cartoon faces and eyebrow filters, but it has no native tool for a photo-real face swap. Once you know how to face swap on Zoom with a virtual camera, though, the setup is just as simple as picking a different webcam from the menu.
This guide walks through how to face swap on Zoom from start to finish with the LiveSwapFace desktop app. It covers picking a reference photo, sending the live AI face to the virtual camera, selecting it inside Zoom, turning off the Zoom settings that get in the way and fixing the usual "camera not showing up" problem.
How a Face Swap on Zoom Works
Zoom lets you choose any camera registered on your computer. Instead of reading your physical webcam directly, Zoom reads a virtual camera created by the LiveSwapFace app:
- The LiveSwapFace app opens your physical webcam.
- The cloud AI model swaps your face in real time using a single reference photo, so your computer does not need a dedicated graphics card.
- The app sends that live video to LiveSwapFace Camera.
- You select LiveSwapFace Camera inside Zoom as your video source.
If you only need the AI face in a meeting, select LiveSwapFace Camera straight in Zoom. If you also want stream overlays, custom framing or microphone delay adjustments, you can route the camera through OBS first with our face swap for OBS guide and pick OBS Virtual Camera in Zoom instead.
What You Need to Face Swap on Zoom
- The Zoom desktop app. Join from the installed Zoom Workplace app rather than a browser tab, which often hides virtual cameras or lowers their resolution.
- The LiveSwapFace desktop app. No dedicated graphics card is required, because the AI model runs in the cloud.
- A webcam. A built-in laptop camera or a USB webcam both work.
- A steady internet connection. Upload speed matters most, since your camera feed goes to the cloud and back in real time.
- One reference photo of the face you want to use on the call.
Step 1: Choose a Reference Photo
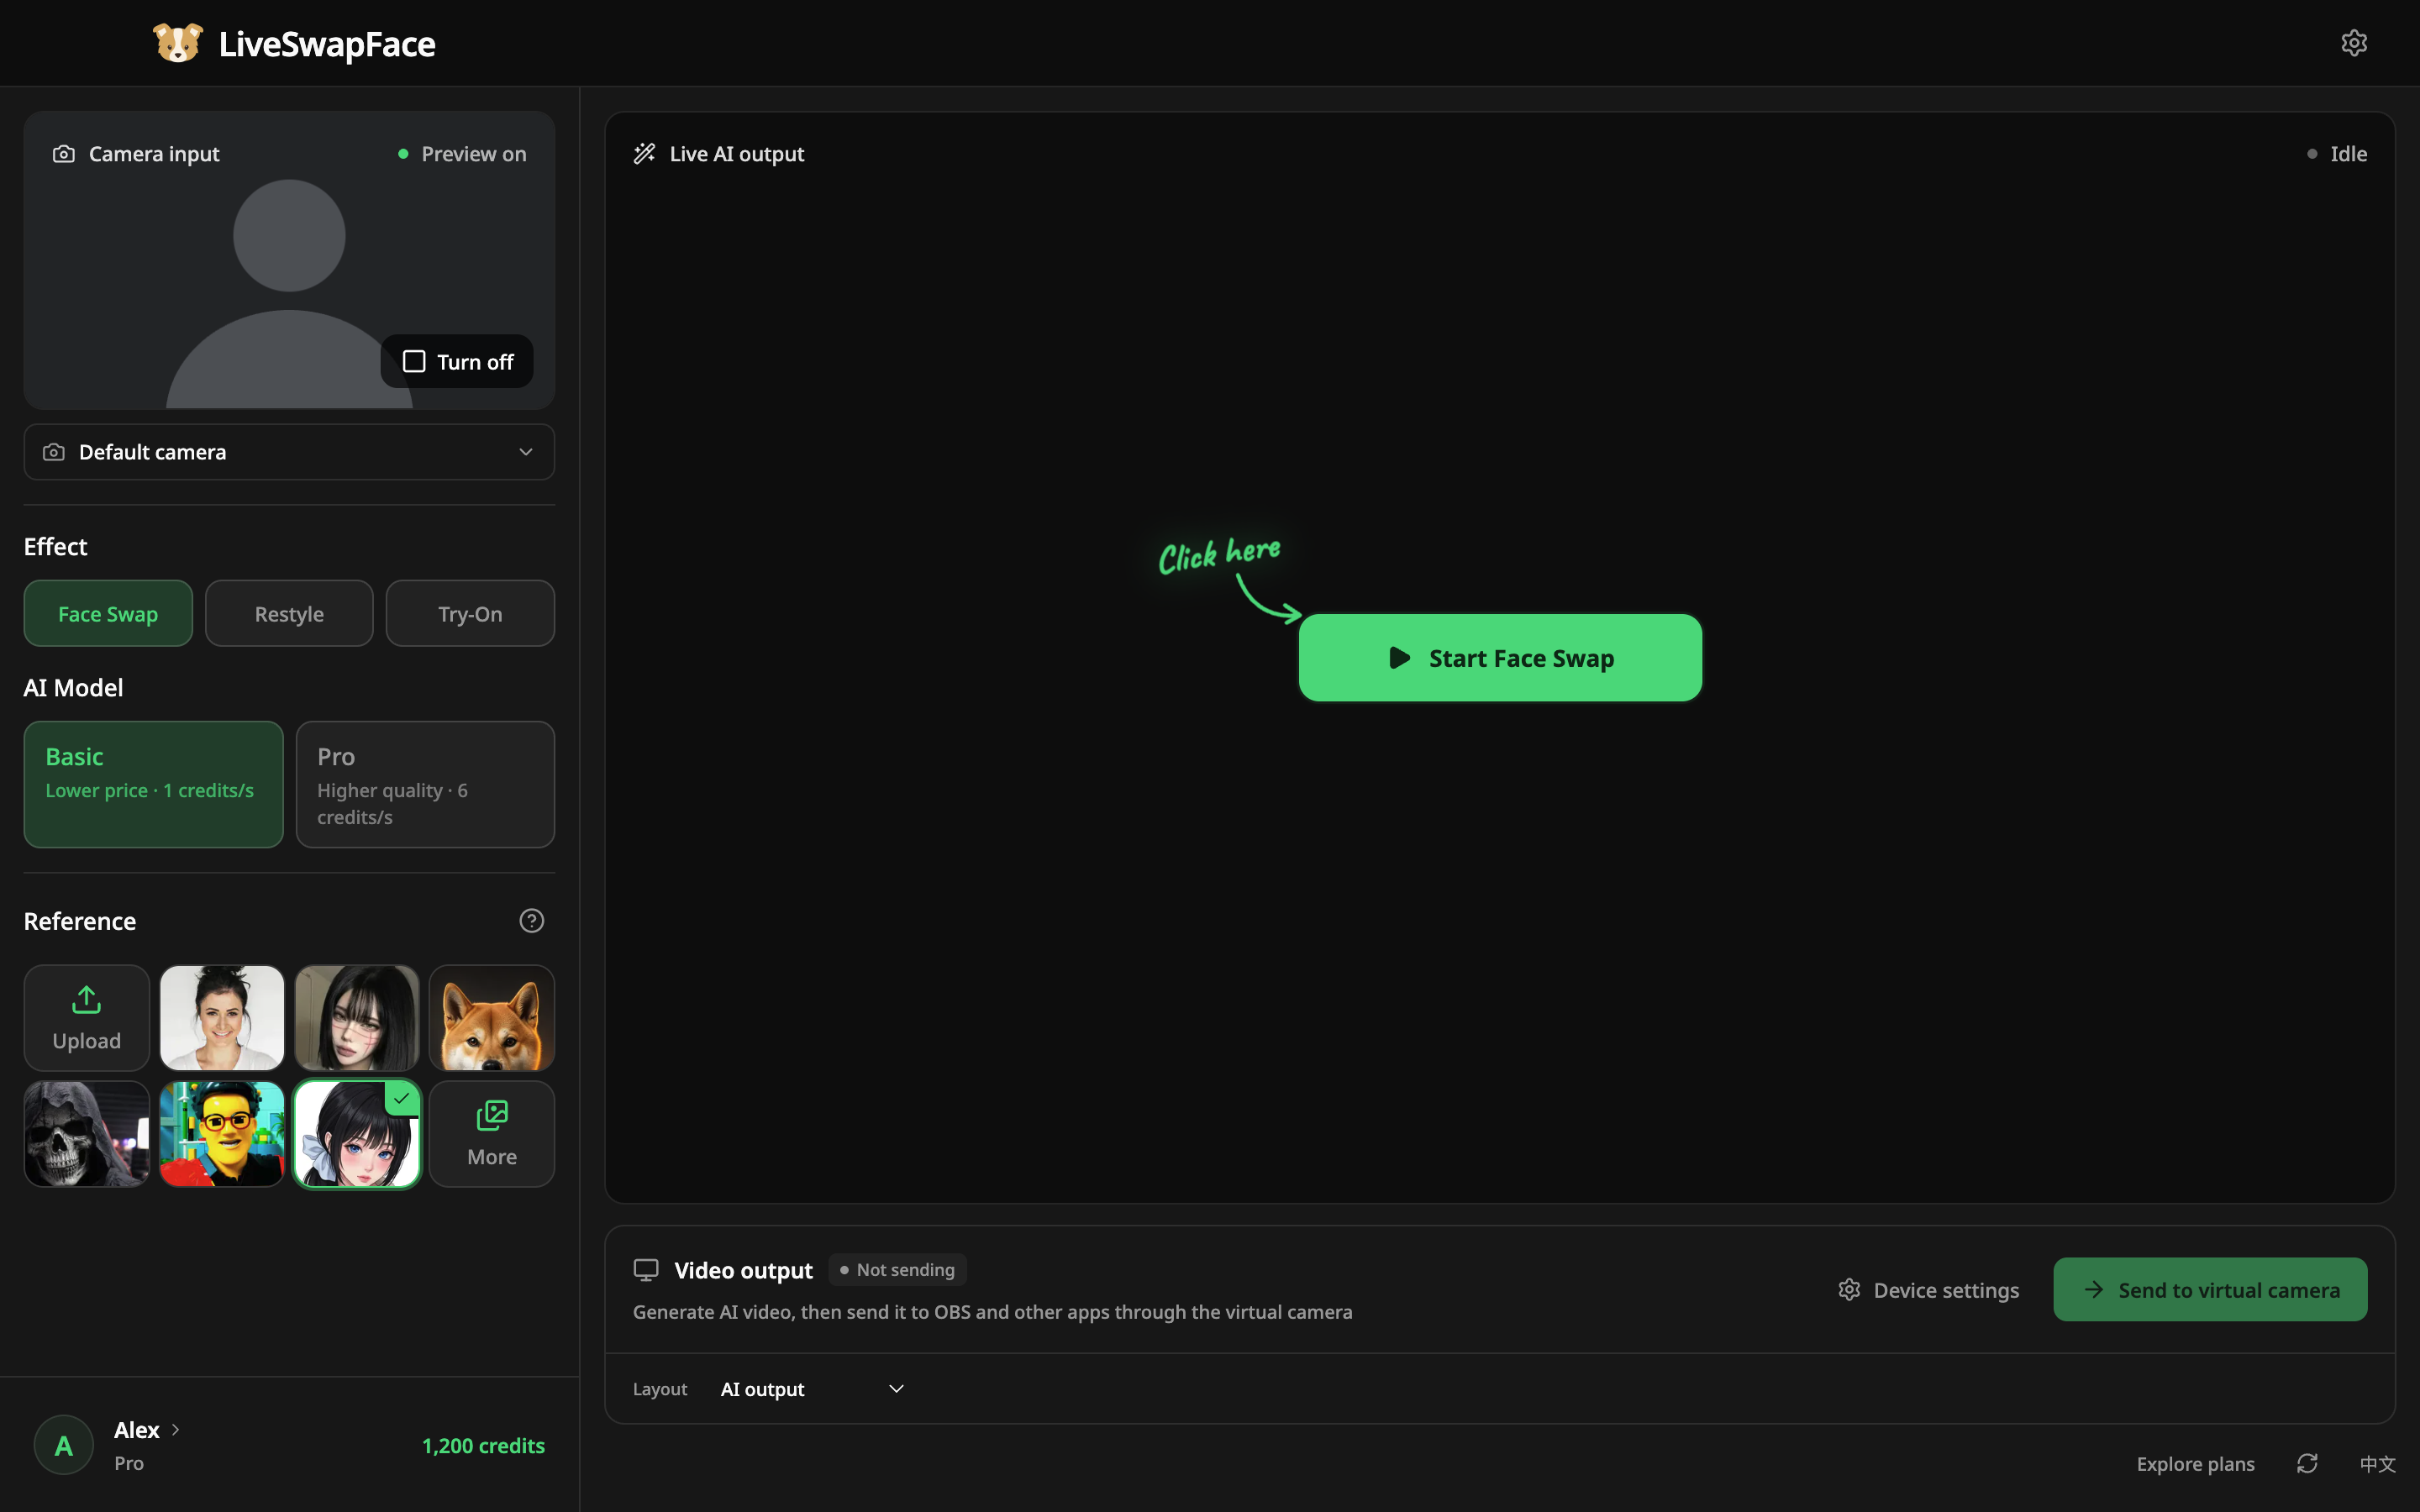
LiveSwapFace only needs one photo. There is no model training and no video dataset to prepare. When learning how to face swap on Zoom, the reference photo makes the biggest difference to the result: pick a clear, front-facing face with even light, the whole head inside the frame and no strong light behind the subject.
You can pick one of the built-in faces in the app or upload your own photo. Alongside Face Swap, the app includes two other live modes that work the same way on a call: Restyle redraws your whole video in a new style such as anime or 3D cartoon, and Try-On puts a chosen outfit on you in real time, using the same engine as our live virtual try-on page.
Step 2: Install the App and Enable the Virtual Camera
Download the desktop app, run the installer and enable the virtual camera inside the app. Next, click sign in. A browser window opens so you can confirm your account, and then it takes you back to the app.
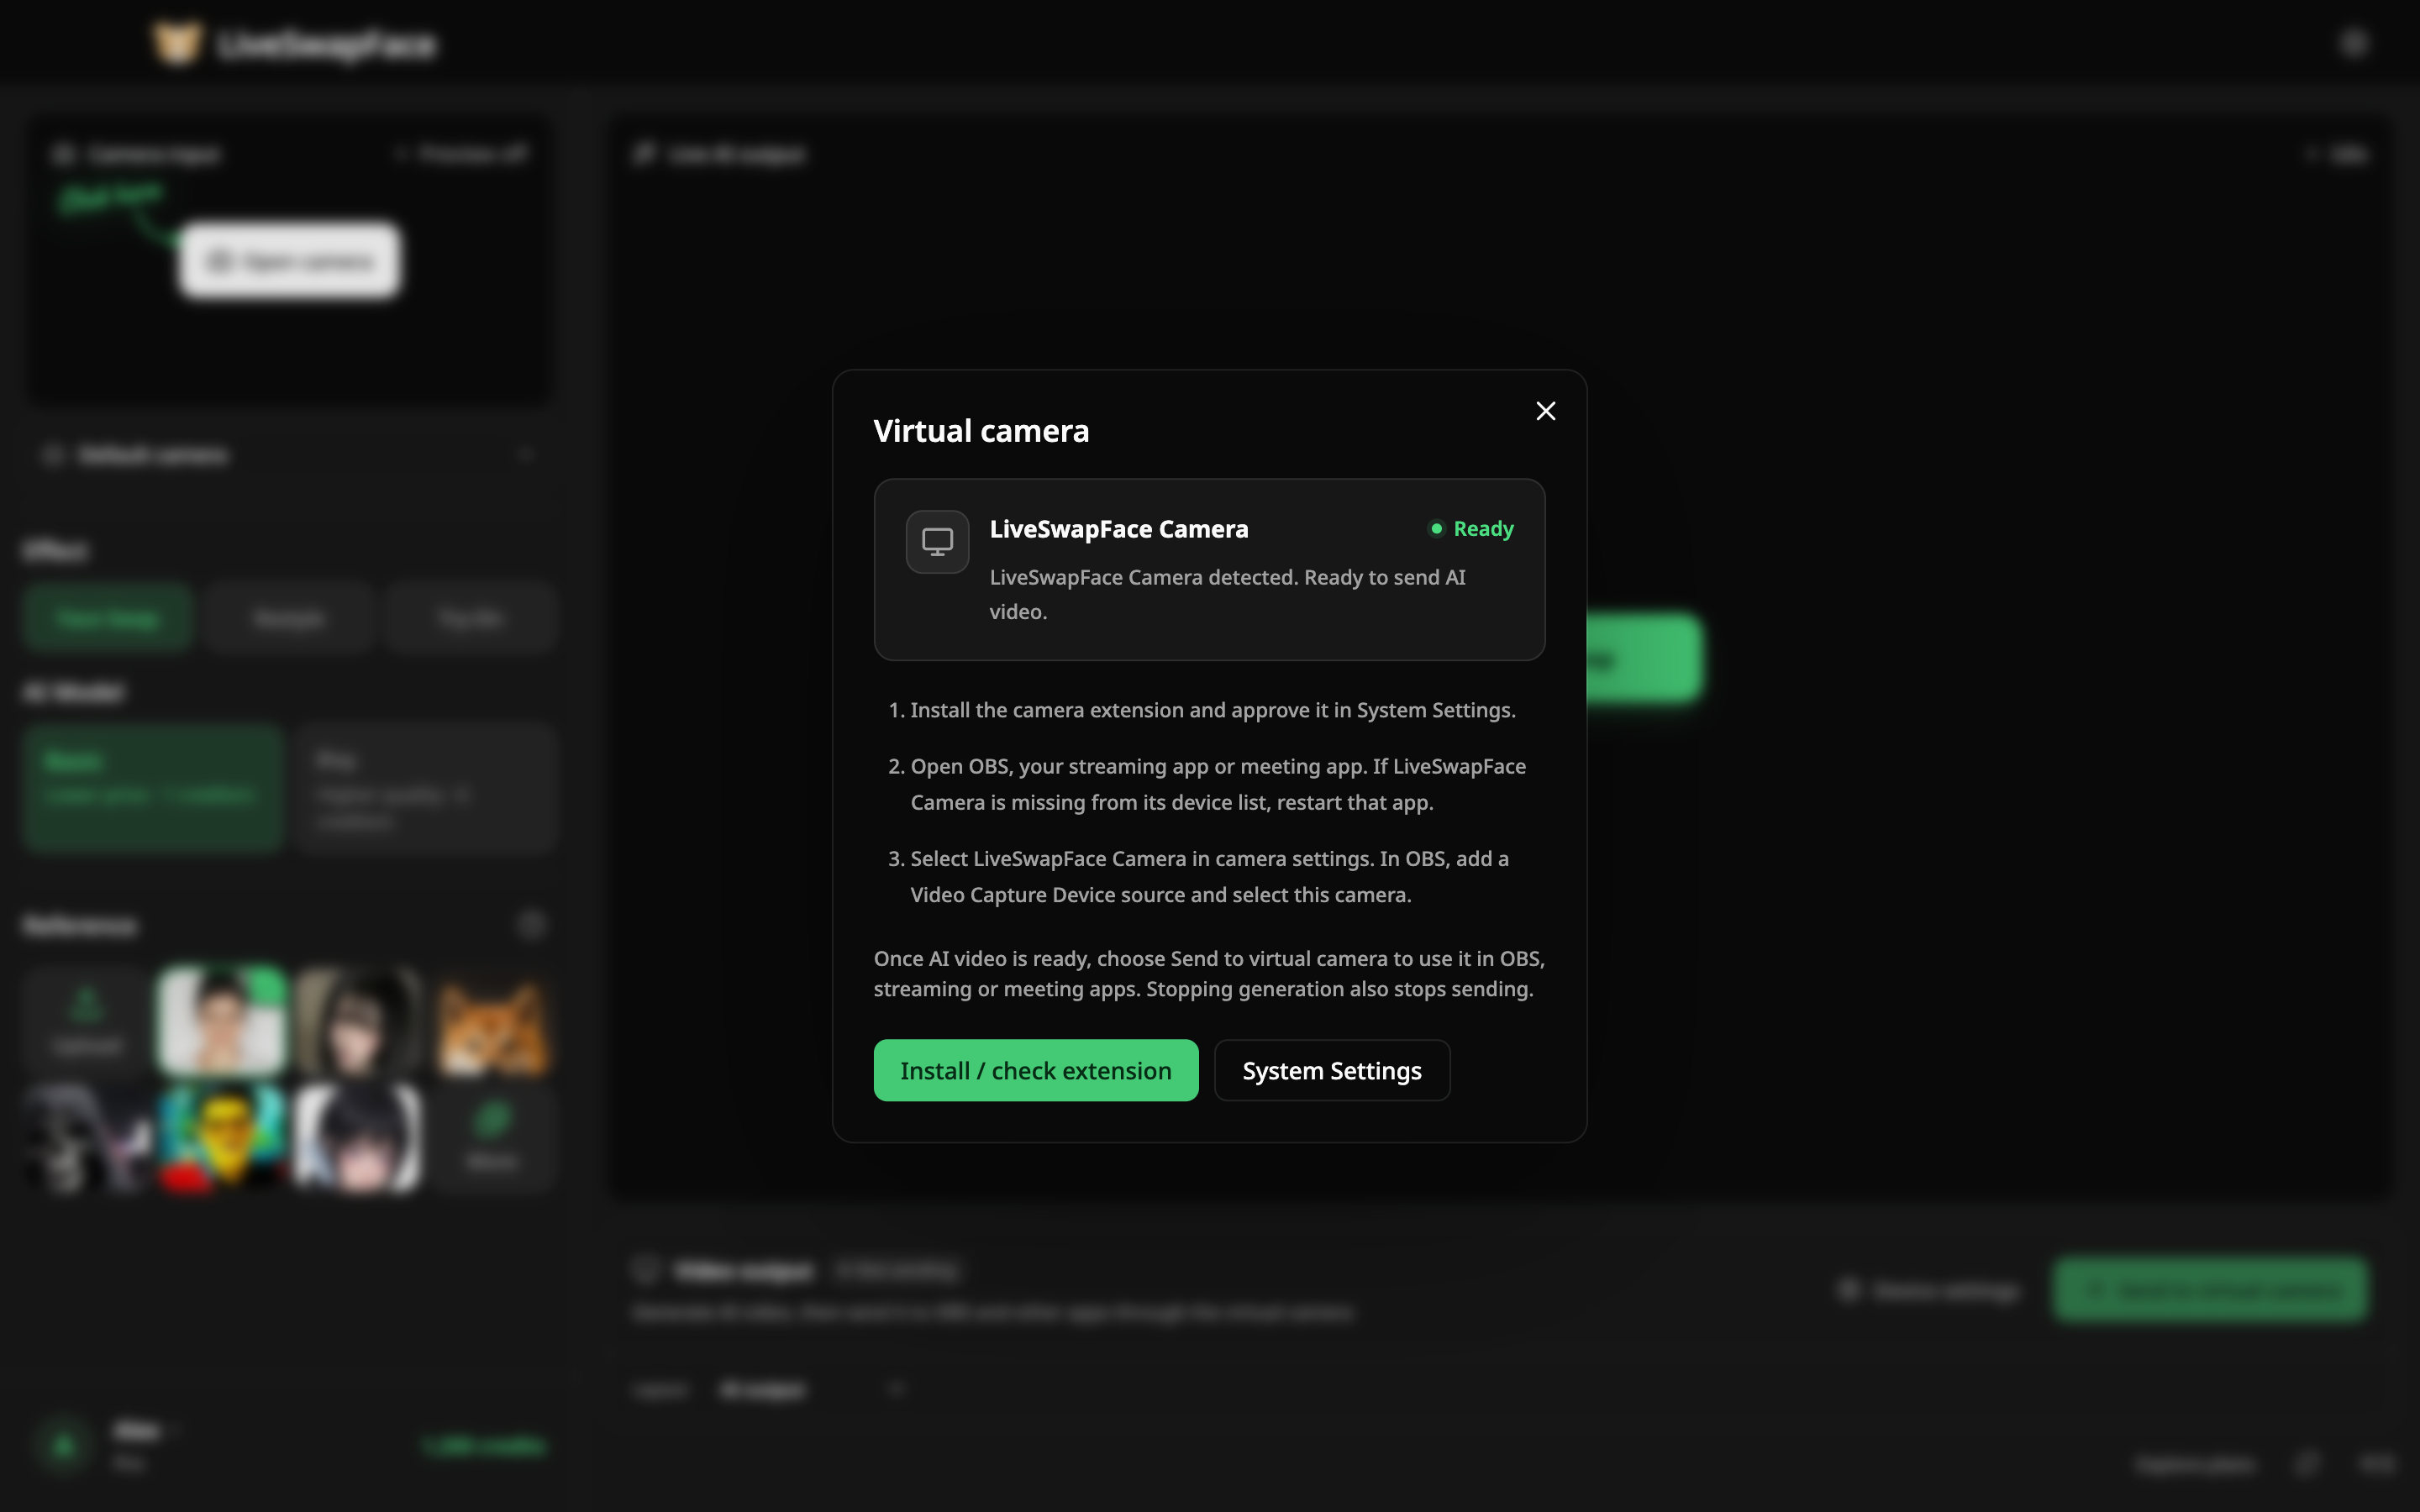
Once enabled, LiveSwapFace Camera stays registered on your system. For future calls, you only need to open the app and start an effect.
Step 3: Start the Effect and Send It to the Camera
In the app, select Face Swap (or Restyle or Try-On), choose your reference image and check your physical webcam in the preview. Press Start.
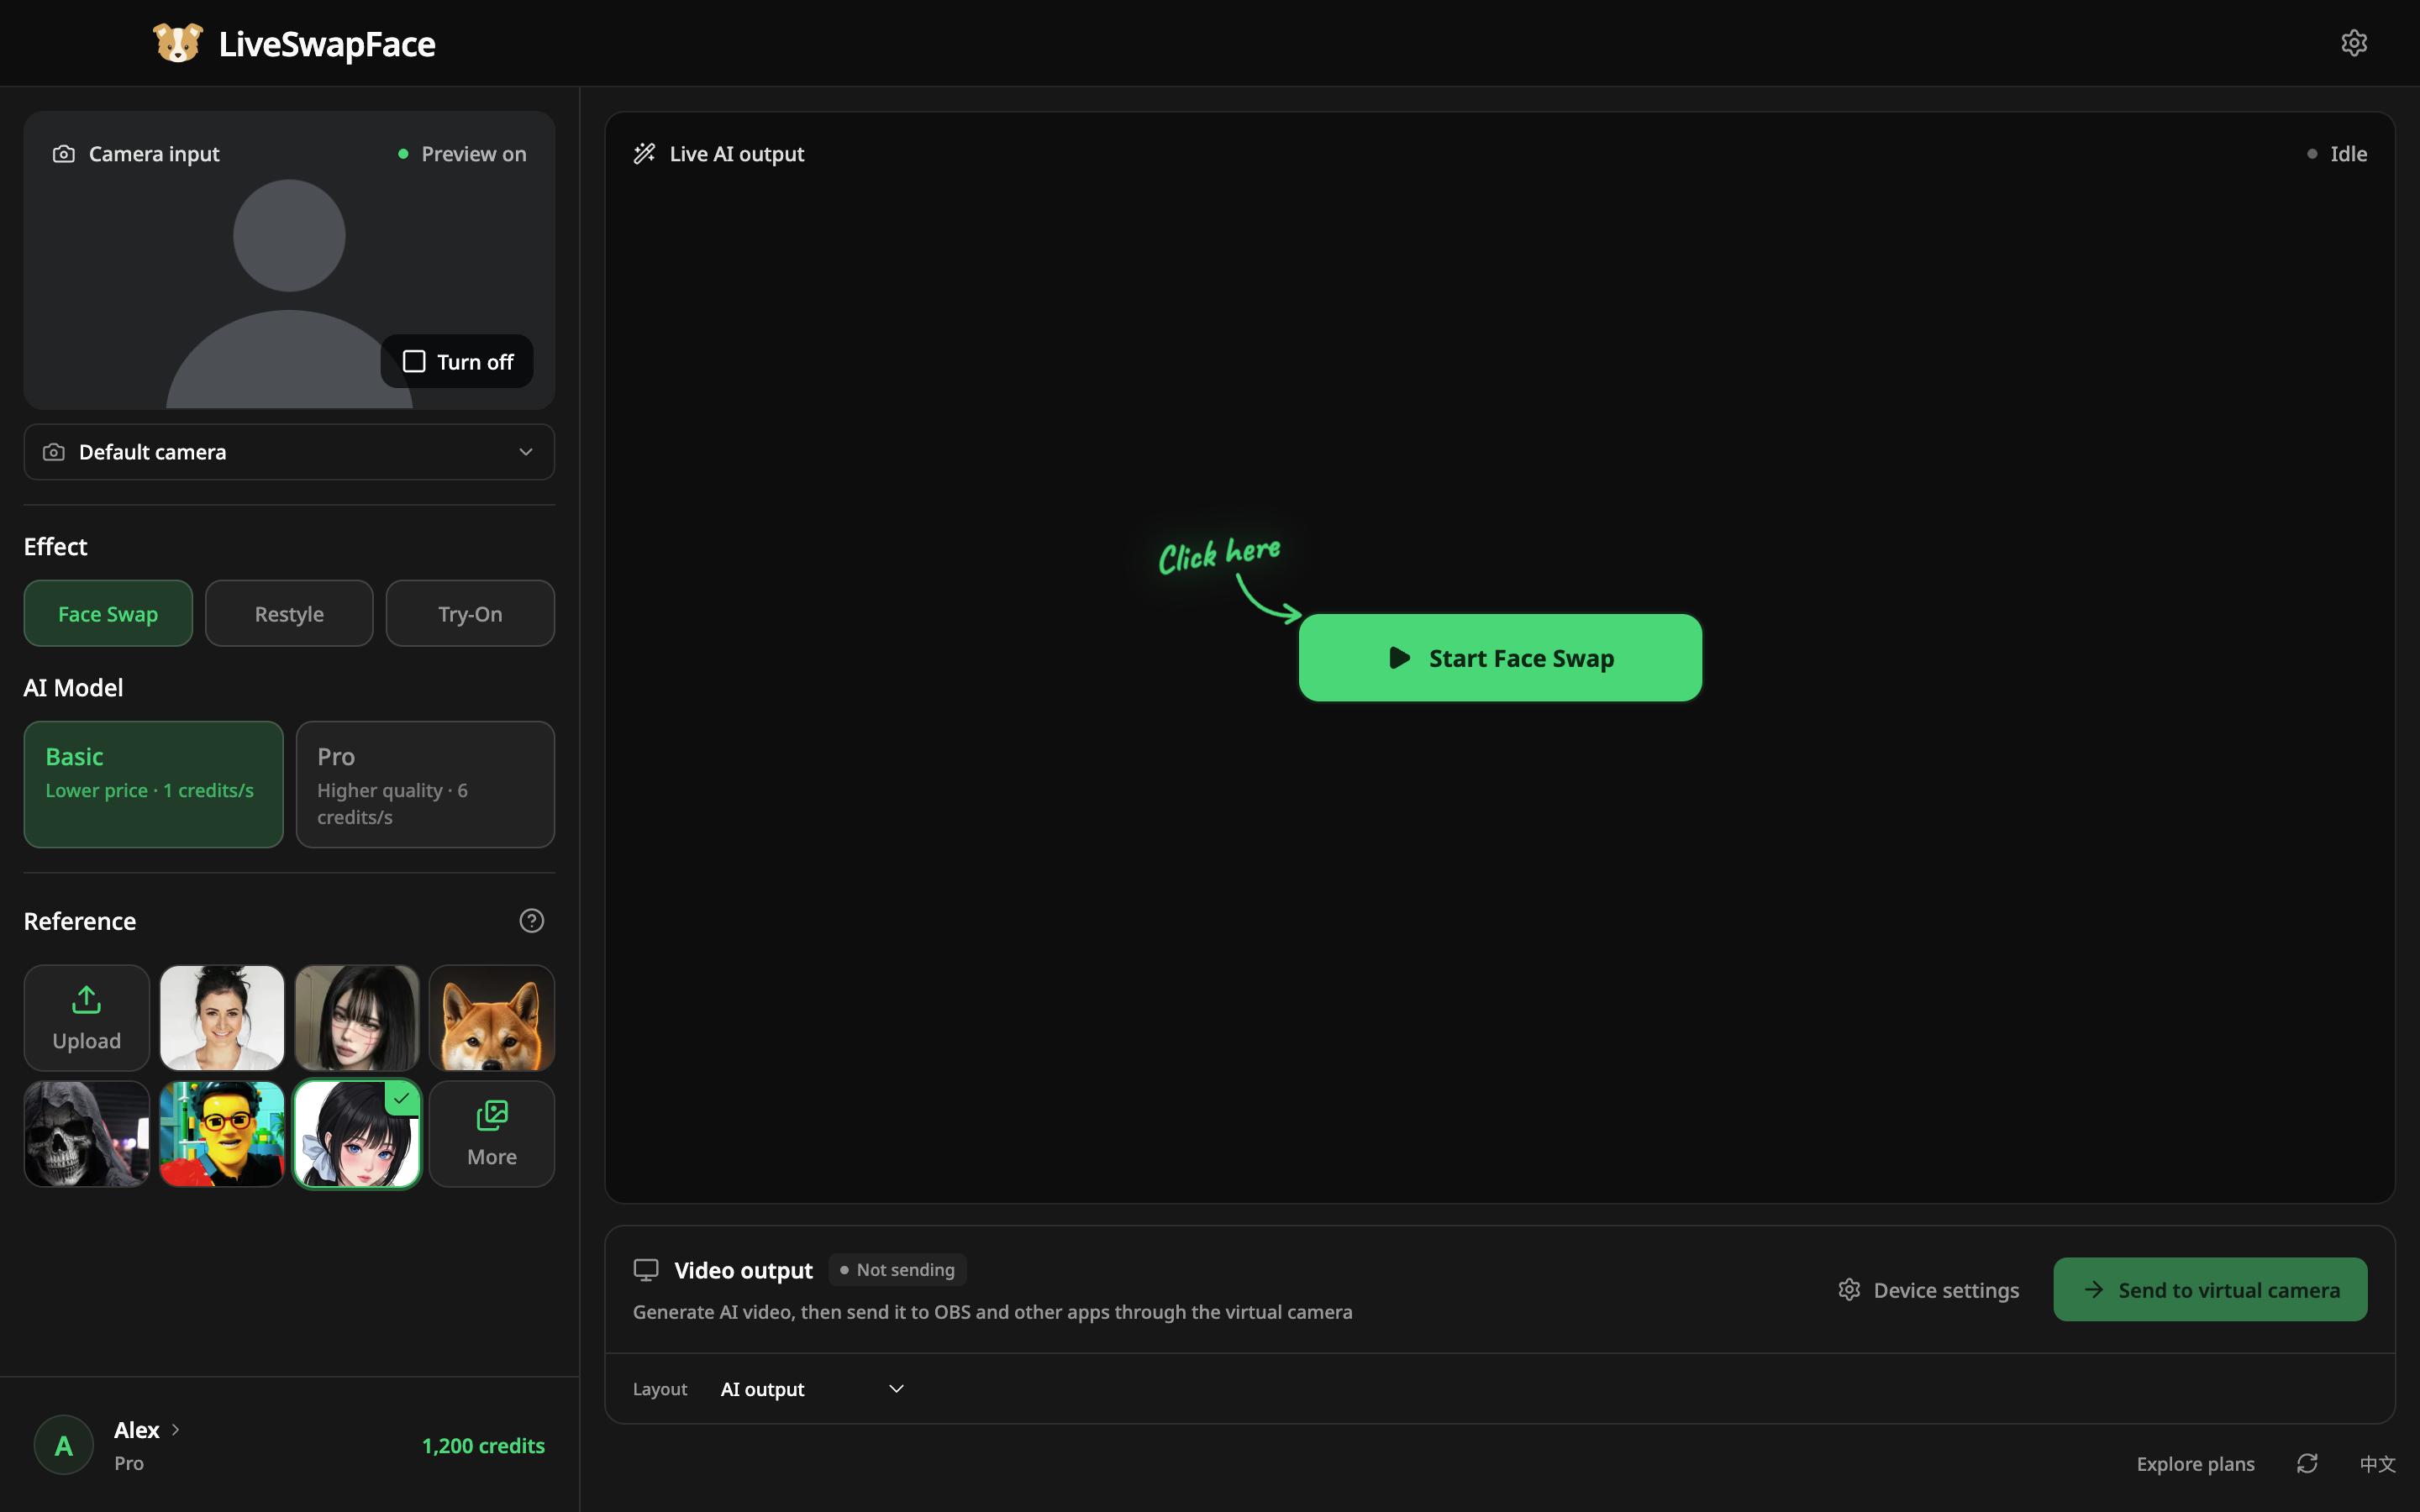
When the AI video appears, click Send to virtual camera. Until you press this button, LiveSwapFace Camera already shows up in Zoom's device list, but it has no picture to send. Once active, the status next to Video output changes from Not sending to Sending.
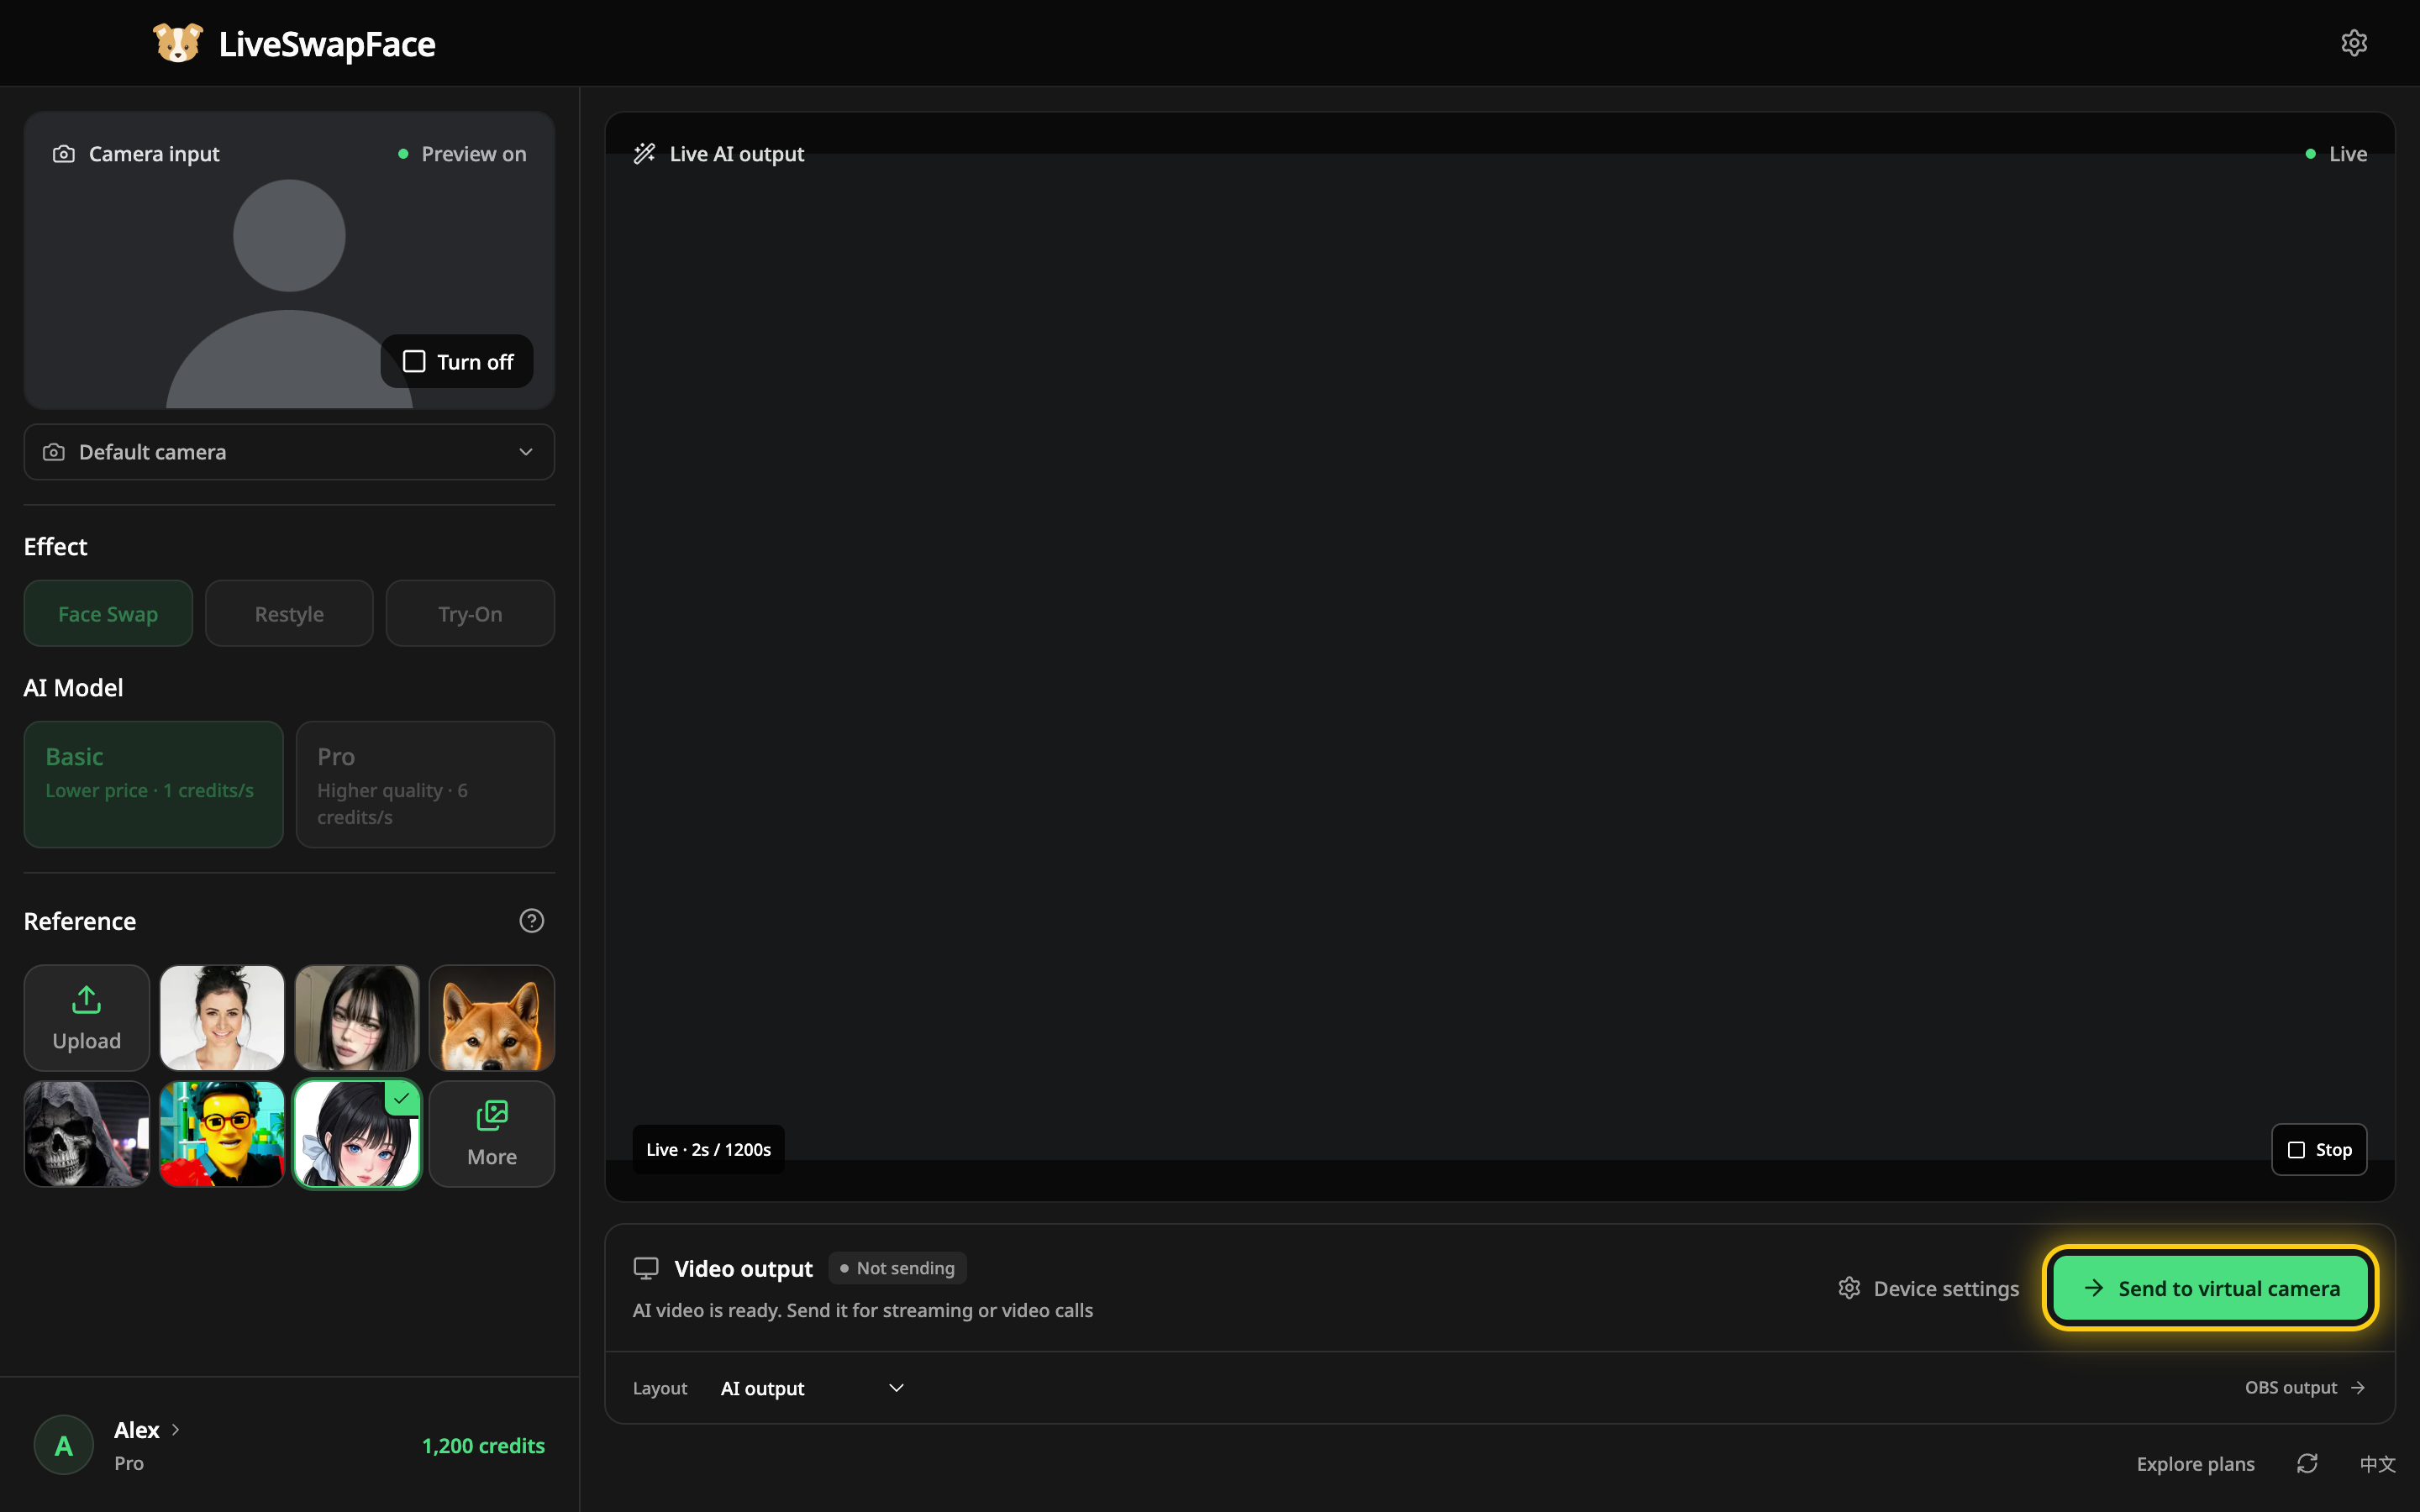
Below the button, Layout controls what people on the call see:
- AI output. Only the generated video. This is the standard choice for a Zoom call.
- Picture in picture. The AI video with a small preview of your real webcam in the corner.
- Compare. Your real camera and the AI video side by side, useful when showing a before-and-after demo in a meeting.
Step 4: Select LiveSwapFace Camera in Zoom
It is easiest to start the camera in the LiveSwapFace app before you turn on your video in Zoom, so the physical webcam is free for the app to use.
To set it before a meeting:
- Open the Zoom desktop app and click your profile picture in the top-right corner.
- Click Settings and open the Video (or Video & Effects) tab.
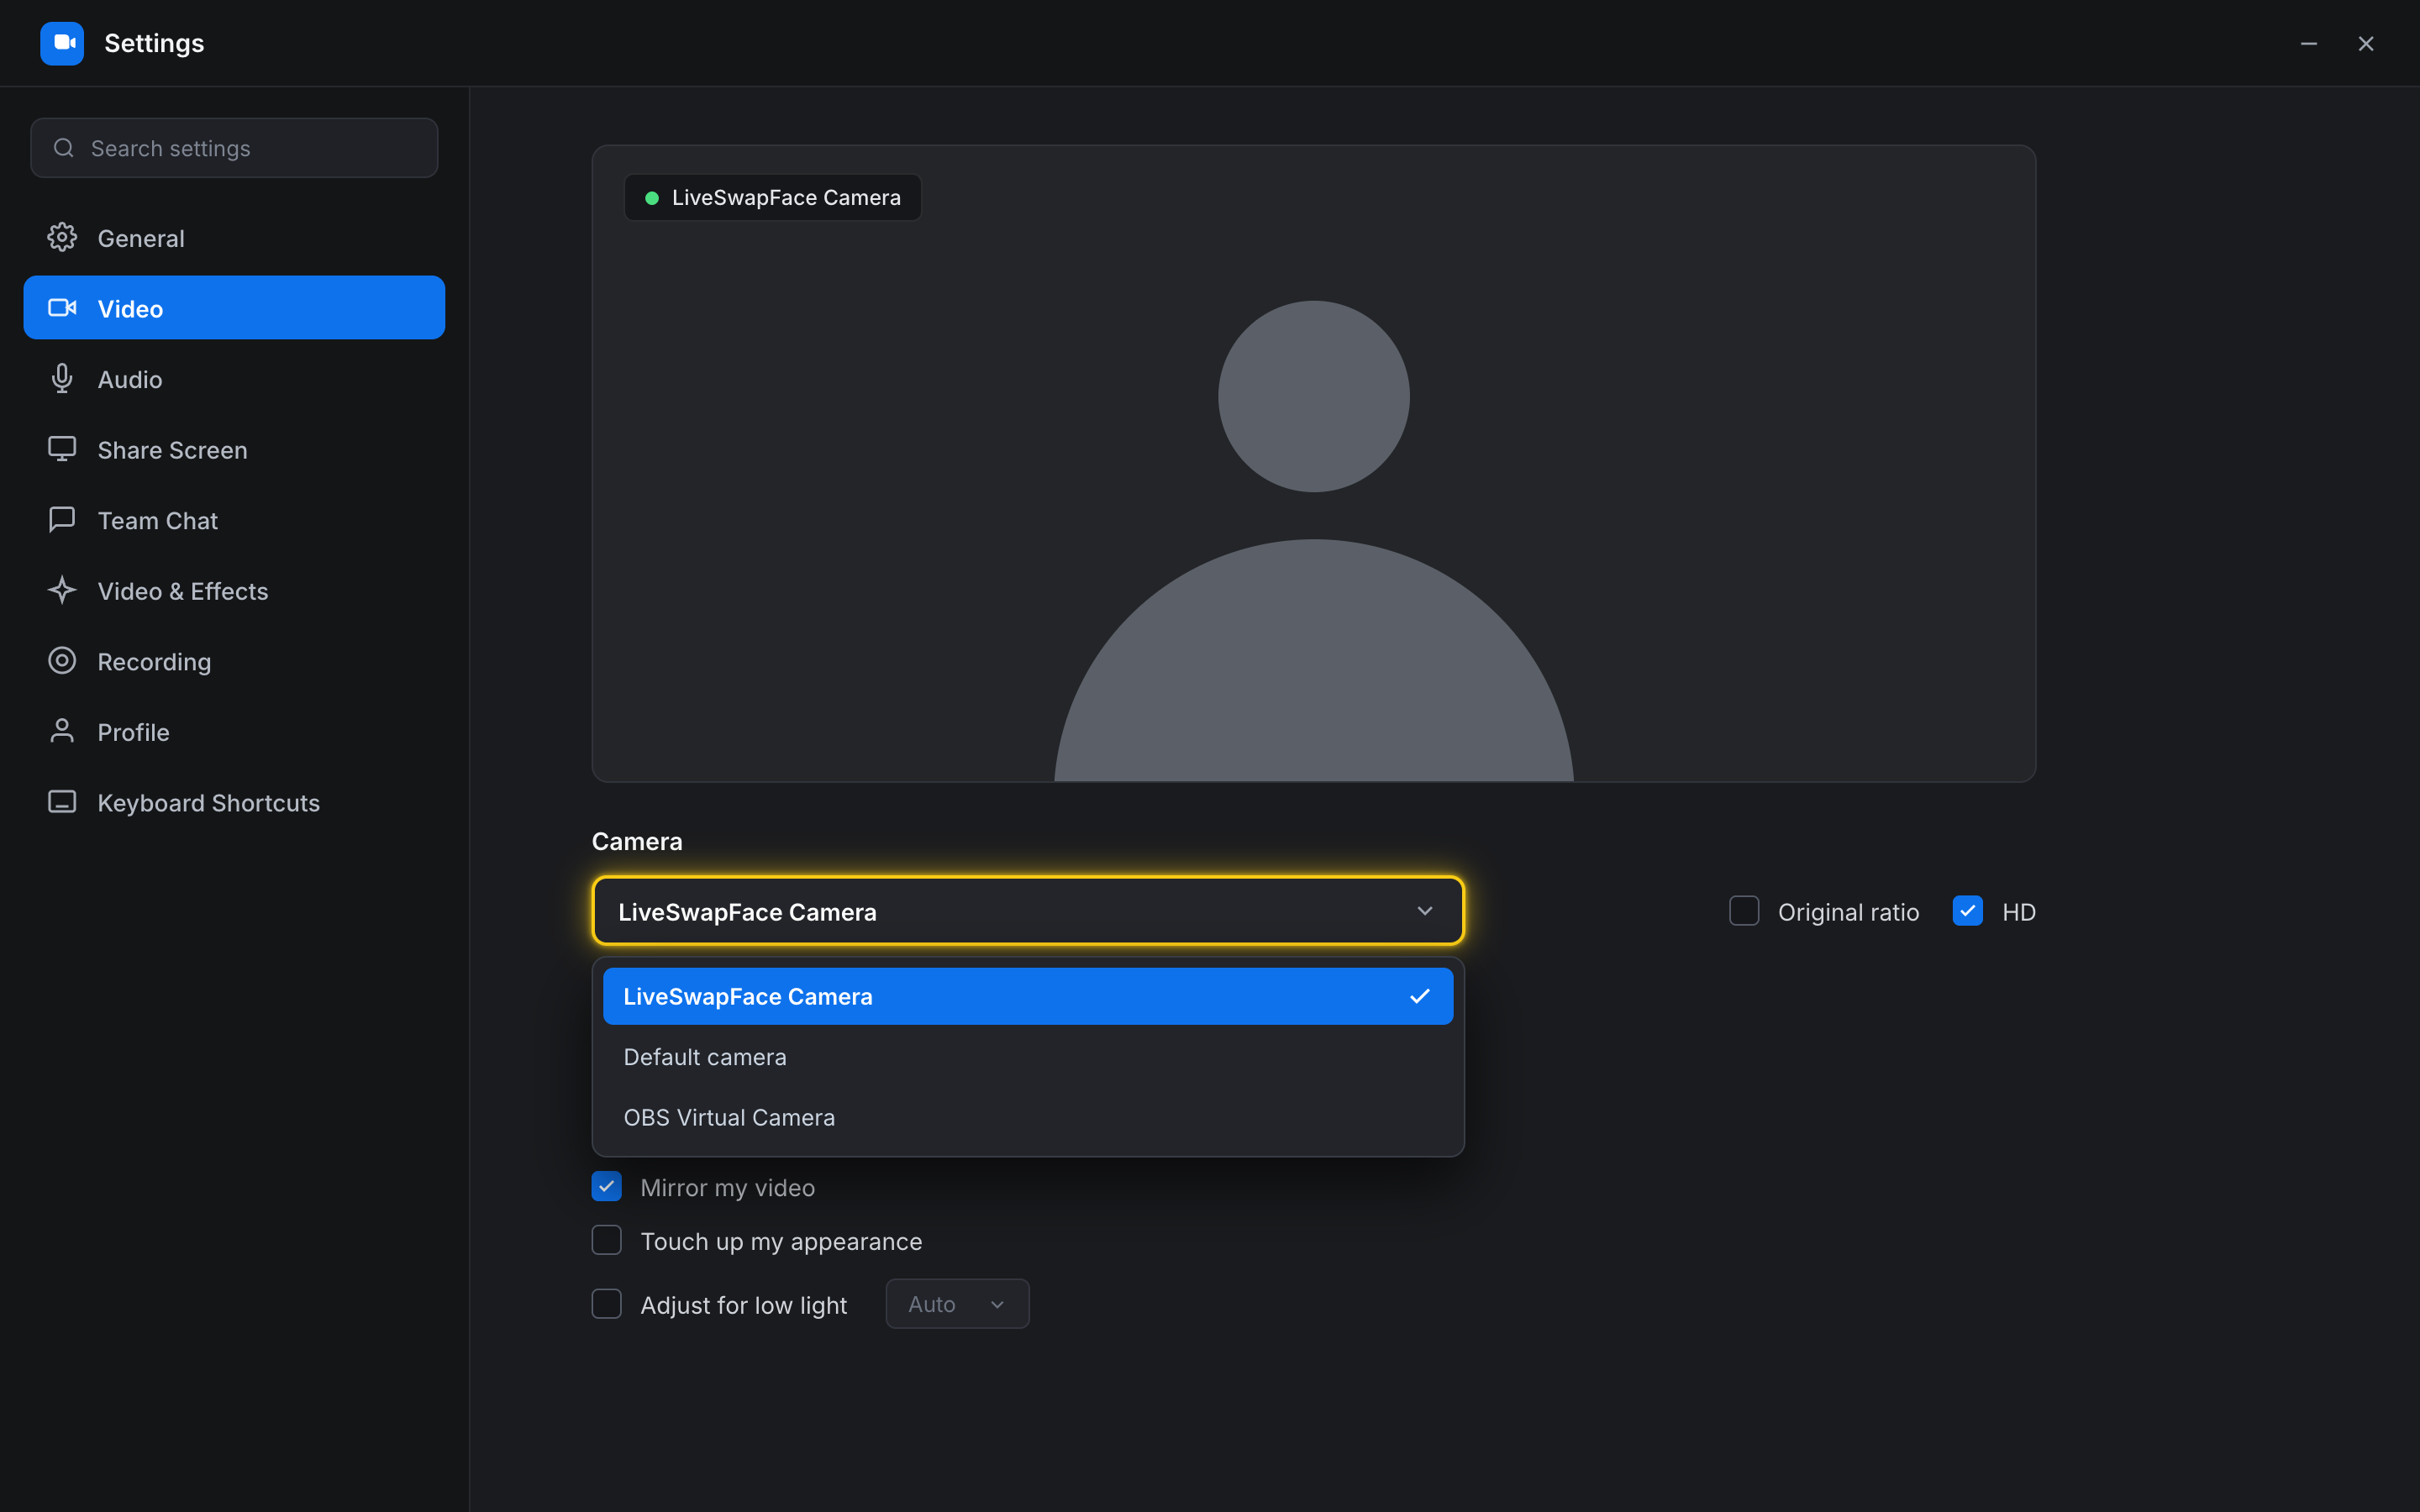
- Under Camera, select LiveSwapFace Camera.
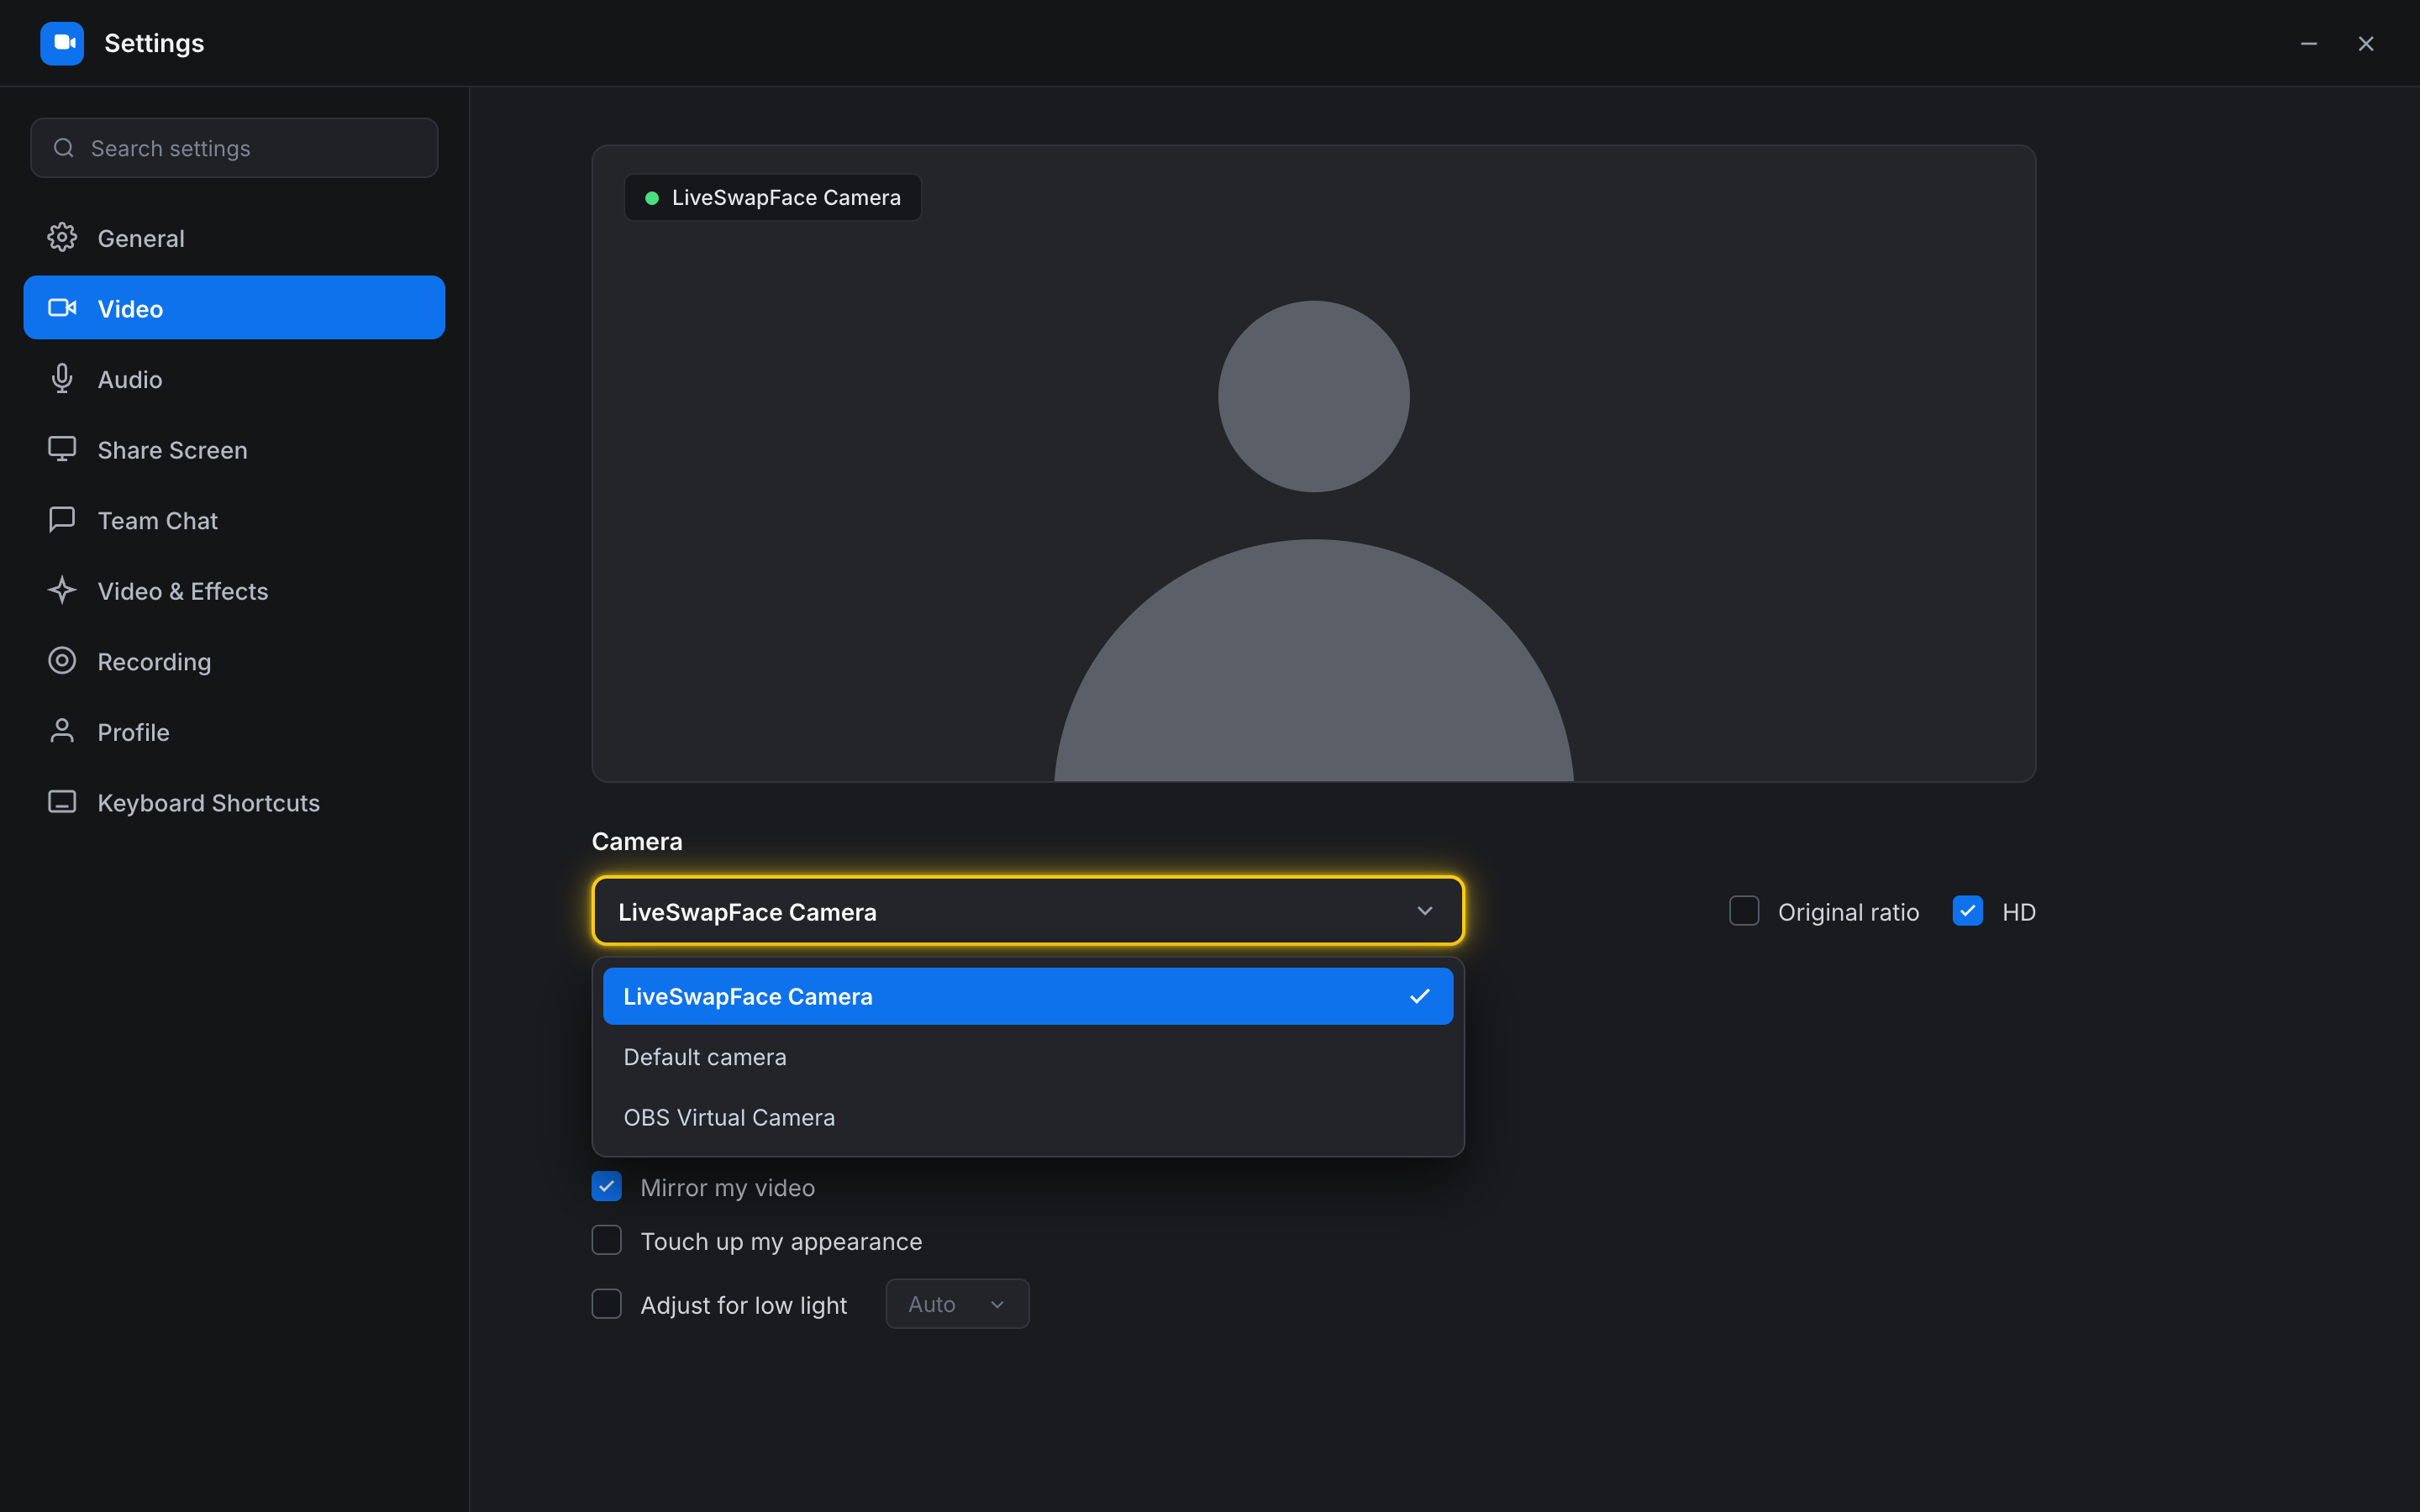
To switch cameras while you are already in a meeting, click the small arrow (^) next to Start Video or Stop Video on the bottom bar and choose LiveSwapFace Camera.
If Zoom was already using your physical webcam when you opened LiveSwapFace, switch Zoom to LiveSwapFace Camera first. Many webcams can be opened by only one program at a time, so freeing the real webcam in Zoom lets the LiveSwapFace app read it without a conflict.
Step 5: Adjust Zoom Video Settings for a Cleaner Picture
Zoom applies several built-in camera adjustments by default. When your video is already coming from an AI virtual camera, a few of those options work against you. Open Settings → Video in Zoom and check these three items:
- Turn off Touch up my appearance. Zoom's skin smoothing blurs the AI face a second time and makes the edges look soft.
- Turn off Zoom virtual backgrounds and video filters. Running Zoom's background cutout on top of the AI video uses extra CPU and can cause flickering around your hair and shoulders.
- Understand Mirror my video. When Mirror my video is ticked, Zoom flips your own preview horizontally so moving left or right feels like looking in a mirror. Other people on the call always see the unflipped image either way.
Good lighting in the room helps just as much. Sit with a window or a lamp in front of you rather than behind you, and avoid resting your hand on your chin, which covers the landmarks the model uses to track your mouth and jaw.
How Audio Works on the Call
The LiveSwapFace app only handles video. It does not change your voice and never requests your microphone, so you select your usual headset or desk microphone in Zoom's Audio settings.
Because your voice goes straight into Zoom while the video travels to the cloud and back, your voice runs slightly ahead of your lips. On a normal meeting call most people will not notice, and Zoom does not have a built-in microphone delay setting. If you are recording a call where exact lip sync matters, send the camera through OBS first, add a small Sync Offset to your mic there and feed OBS Virtual Camera into Zoom.
When the Camera Doesn't Show Up in Zoom
If your face swap on Zoom shows a black screen, or LiveSwapFace Camera is missing from Zoom's camera menu, check these in order:
- Check the app. Make sure the virtual camera is enabled in the app, the effect is running and Send to virtual camera is turned on.
- Restart Zoom. Zoom scans for camera devices when it starts up. If you enabled the virtual camera while Zoom was already open, quit Zoom completely from the system tray, open it again and check the Camera list.
- Free the physical webcam. Close any other app that might still be holding your real webcam, such as Discord, Teams or a browser tab with camera access, and make sure Zoom itself is pointed at LiveSwapFace Camera rather than the physical camera.
- Check system camera permissions. Make sure desktop apps are allowed to access your camera in your operating system's privacy settings.
Want to test how a reference photo looks on your face before setting up a call? The web version runs the same live face swap right in your browser with the same account.
Conclusion
Once you know how to face swap on Zoom, the setup only takes a minute before a call: open the app, pick your reference photo, press Start and click Send to virtual camera. Select LiveSwapFace Camera in Zoom, and you are ready to join the meeting.
Author