Face Swap for OBS: Add a Live AI Face as a Real Camera Source
Face swap for OBS, step by step: send a live AI face to the LiveSwapFace virtual camera, add it as a camera source, fix lip sync and build stream scenes.
When Snap shut down Snap Camera on January 25, 2023, a lot of streamers lost the simplest trick they had: pick a virtual camera in OBS and go live with a different face. A modern face swap for OBS works the same way, except the filter is now a full AI face that follows your expressions, gaze and head movements instead of a cartoon mask stuck to your nose.
This guide sets up a face swap for OBS from scratch with the LiveSwapFace desktop app on Windows. It covers choosing a reference photo, getting the AI camera into OBS as a normal source, fixing lip sync, building a few scenes around it and sorting out the usual "camera not in the list" problem.
Two Ways to Set Up a Face Swap for OBS
There are two ways to get any AI video into OBS. The first is Window Capture: the tool shows the result in a window, and OBS films that window. It works, but you have to crop away the borders, keep the window open and unminimized, and redo the crop when the window size changes.
The second is a virtual camera. The tool registers a camera with Windows, and OBS adds it as a Video Capture Device, the same source type you would use for a webcam. There is nothing to crop, and OBS remembers the device between sessions. This is how Snap Camera worked, and it is the route this guide uses.
The LiveSwapFace app supports both. Besides the virtual camera, it can open a separate LiveSwapFace Output window with nothing but the AI video in it, which is handy if you already have a Window Capture workflow you like.
What You Need for Face Swap in OBS
- A Windows 11 PC (64-bit). Intel or AMD both work, and no dedicated graphics card is required, because the AI model runs in the cloud.
- A webcam. A built-in laptop camera is fine for a first test.
- OBS Studio. Any recent version.
- A steady internet connection. Upload speed matters most, since your camera feed travels to the cloud and back.
- One reference photo of the face you want to wear on stream.
Step 1: Choose a Reference Photo
LiveSwapFace needs a single photo. There is no training step and no video to upload. In any face swap for OBS, the reference photo decides most of the result, so pick it carefully: a clear, front-facing face, even light, the whole head in the frame, and no strong light coming from behind.
You can use one of the built-in reference faces in the app or upload your own. For a recurring character on your channel, keep one photo and use it every time, so viewers see the same face from stream to stream.
The app also has two other effects worth knowing about for streaming. Restyle redraws the whole picture in a different look, such as anime or a 3D cartoon. Try-On puts a chosen outfit on you in the live video, the same engine behind our live virtual try-on page.
Step 2: Install the App and Turn On the Camera
Download the Windows app, run the installer and enable the virtual camera inside the app. Then sign in. The app opens a browser window where you confirm your account, and you return to the app when that is done.
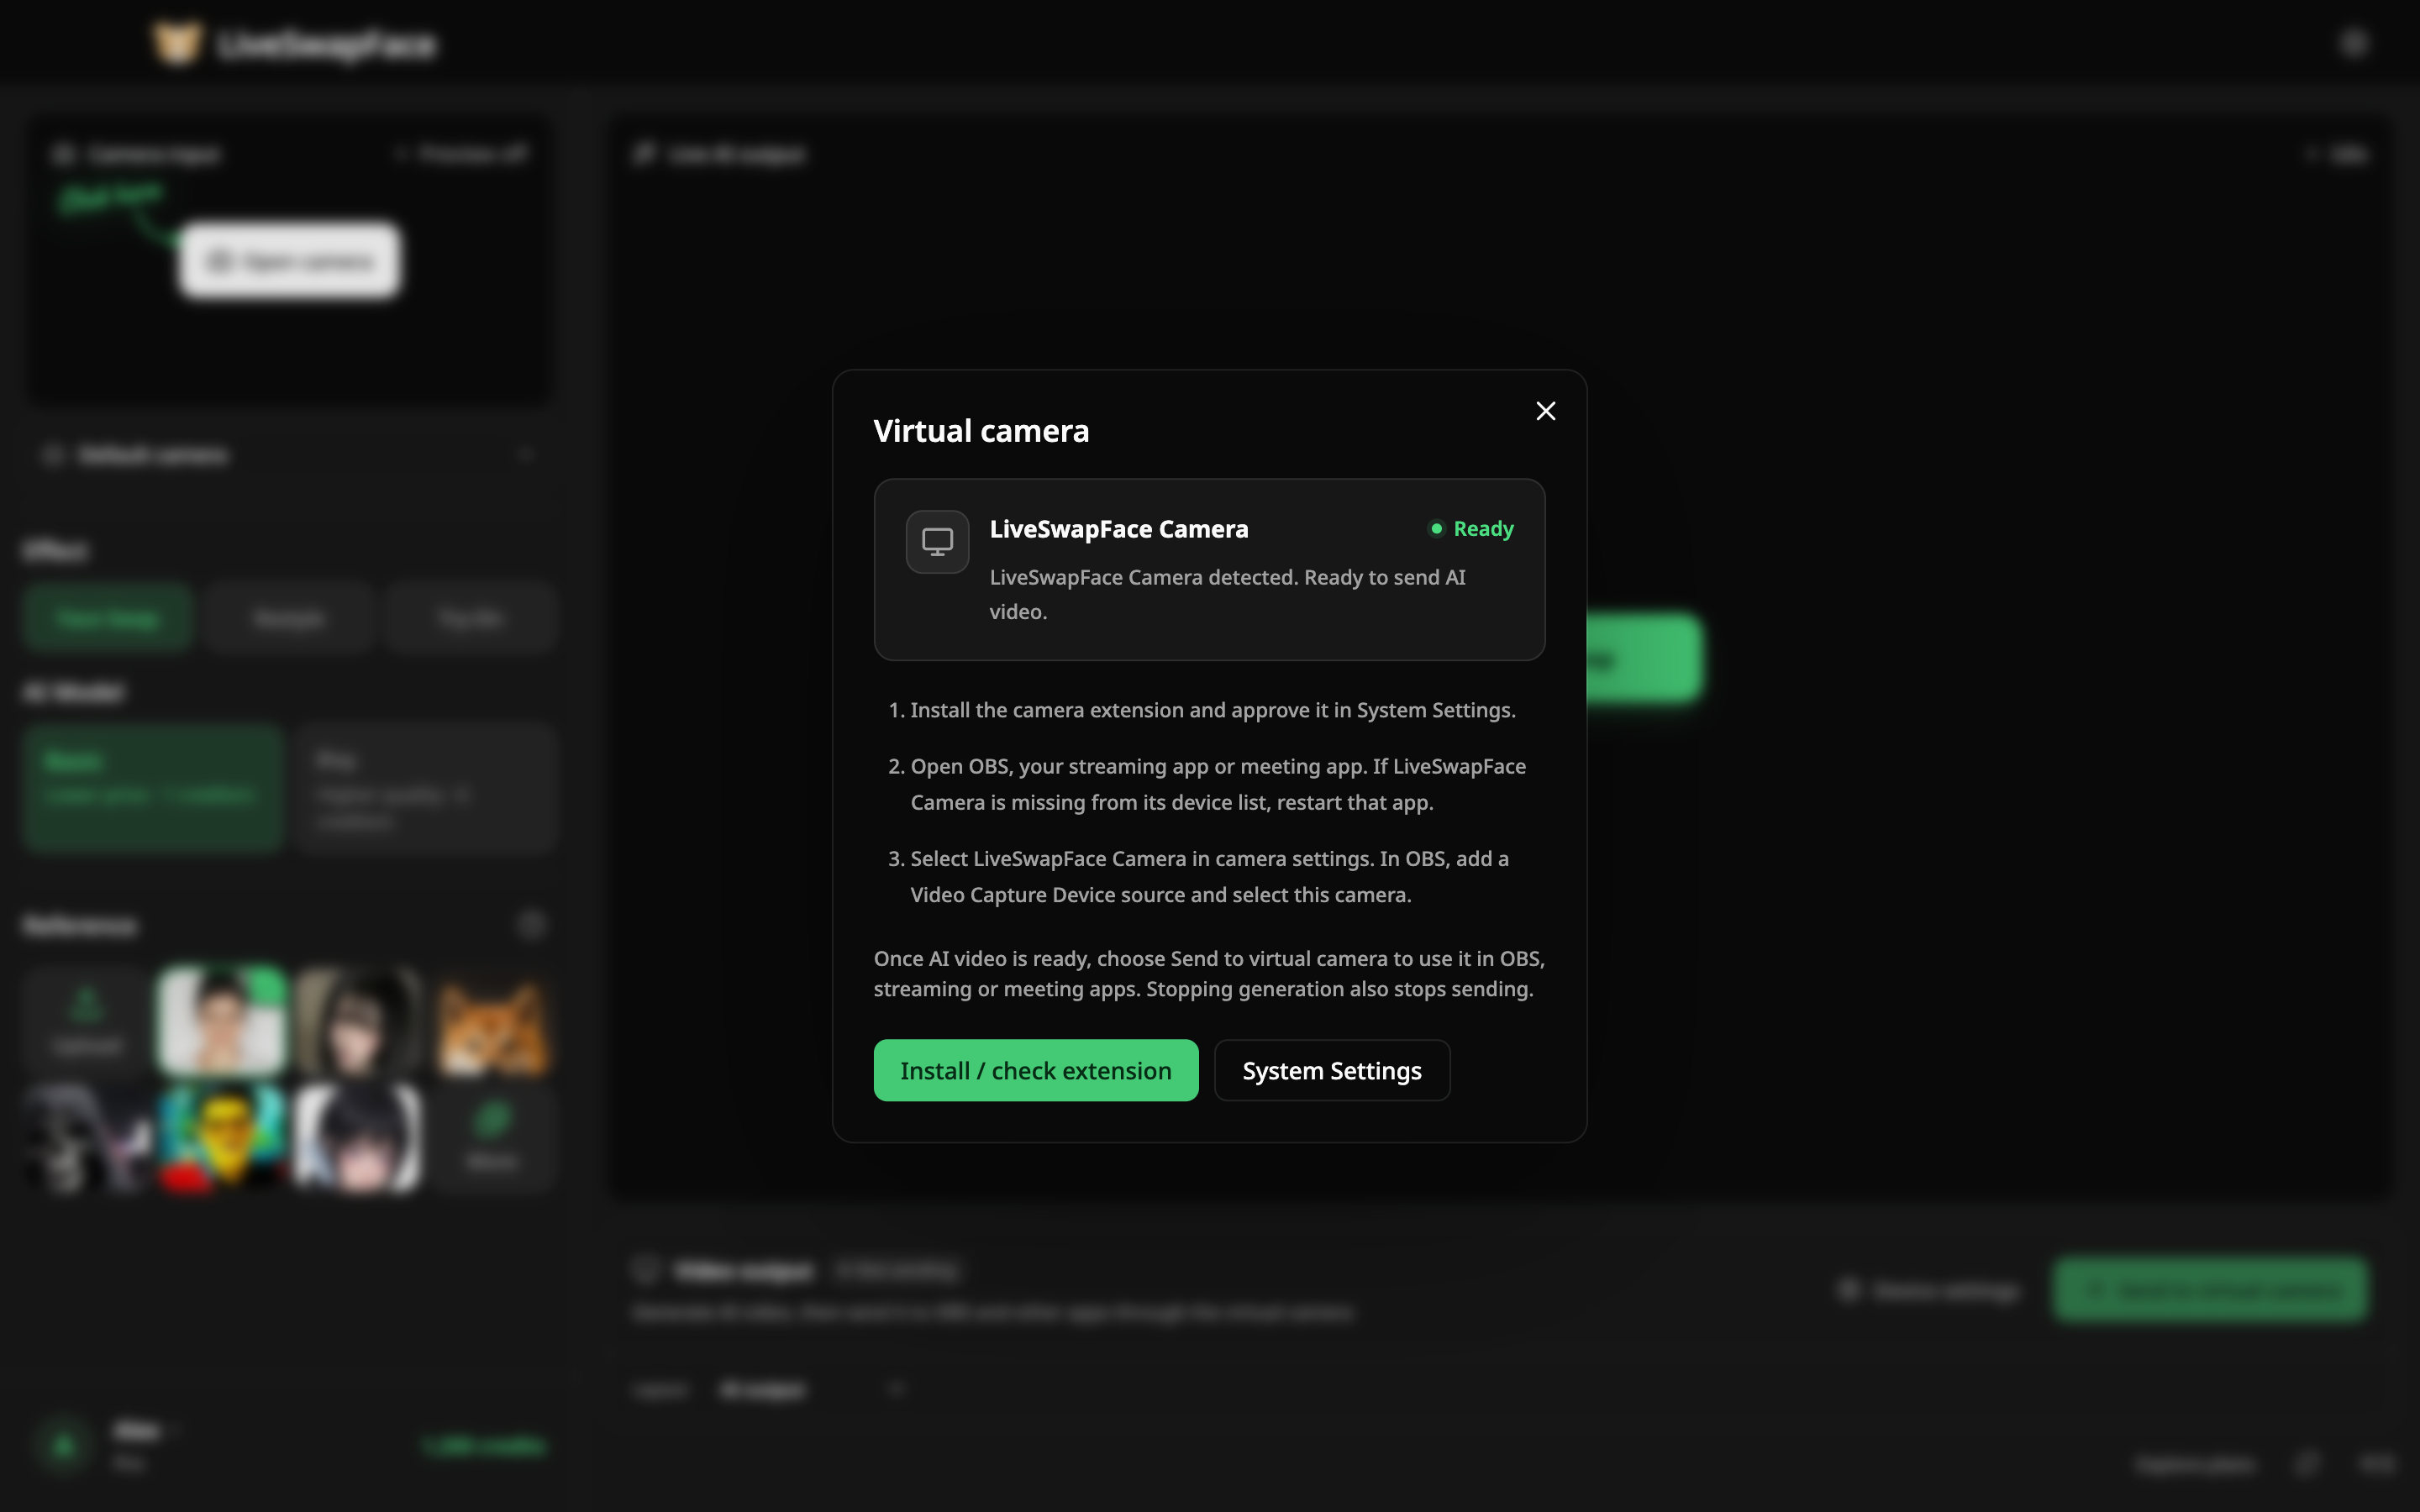
The camera stays registered with Windows after this first setup. Next time, you only open the app and start an effect.
Step 3: Start the Effect and Send It to the Camera
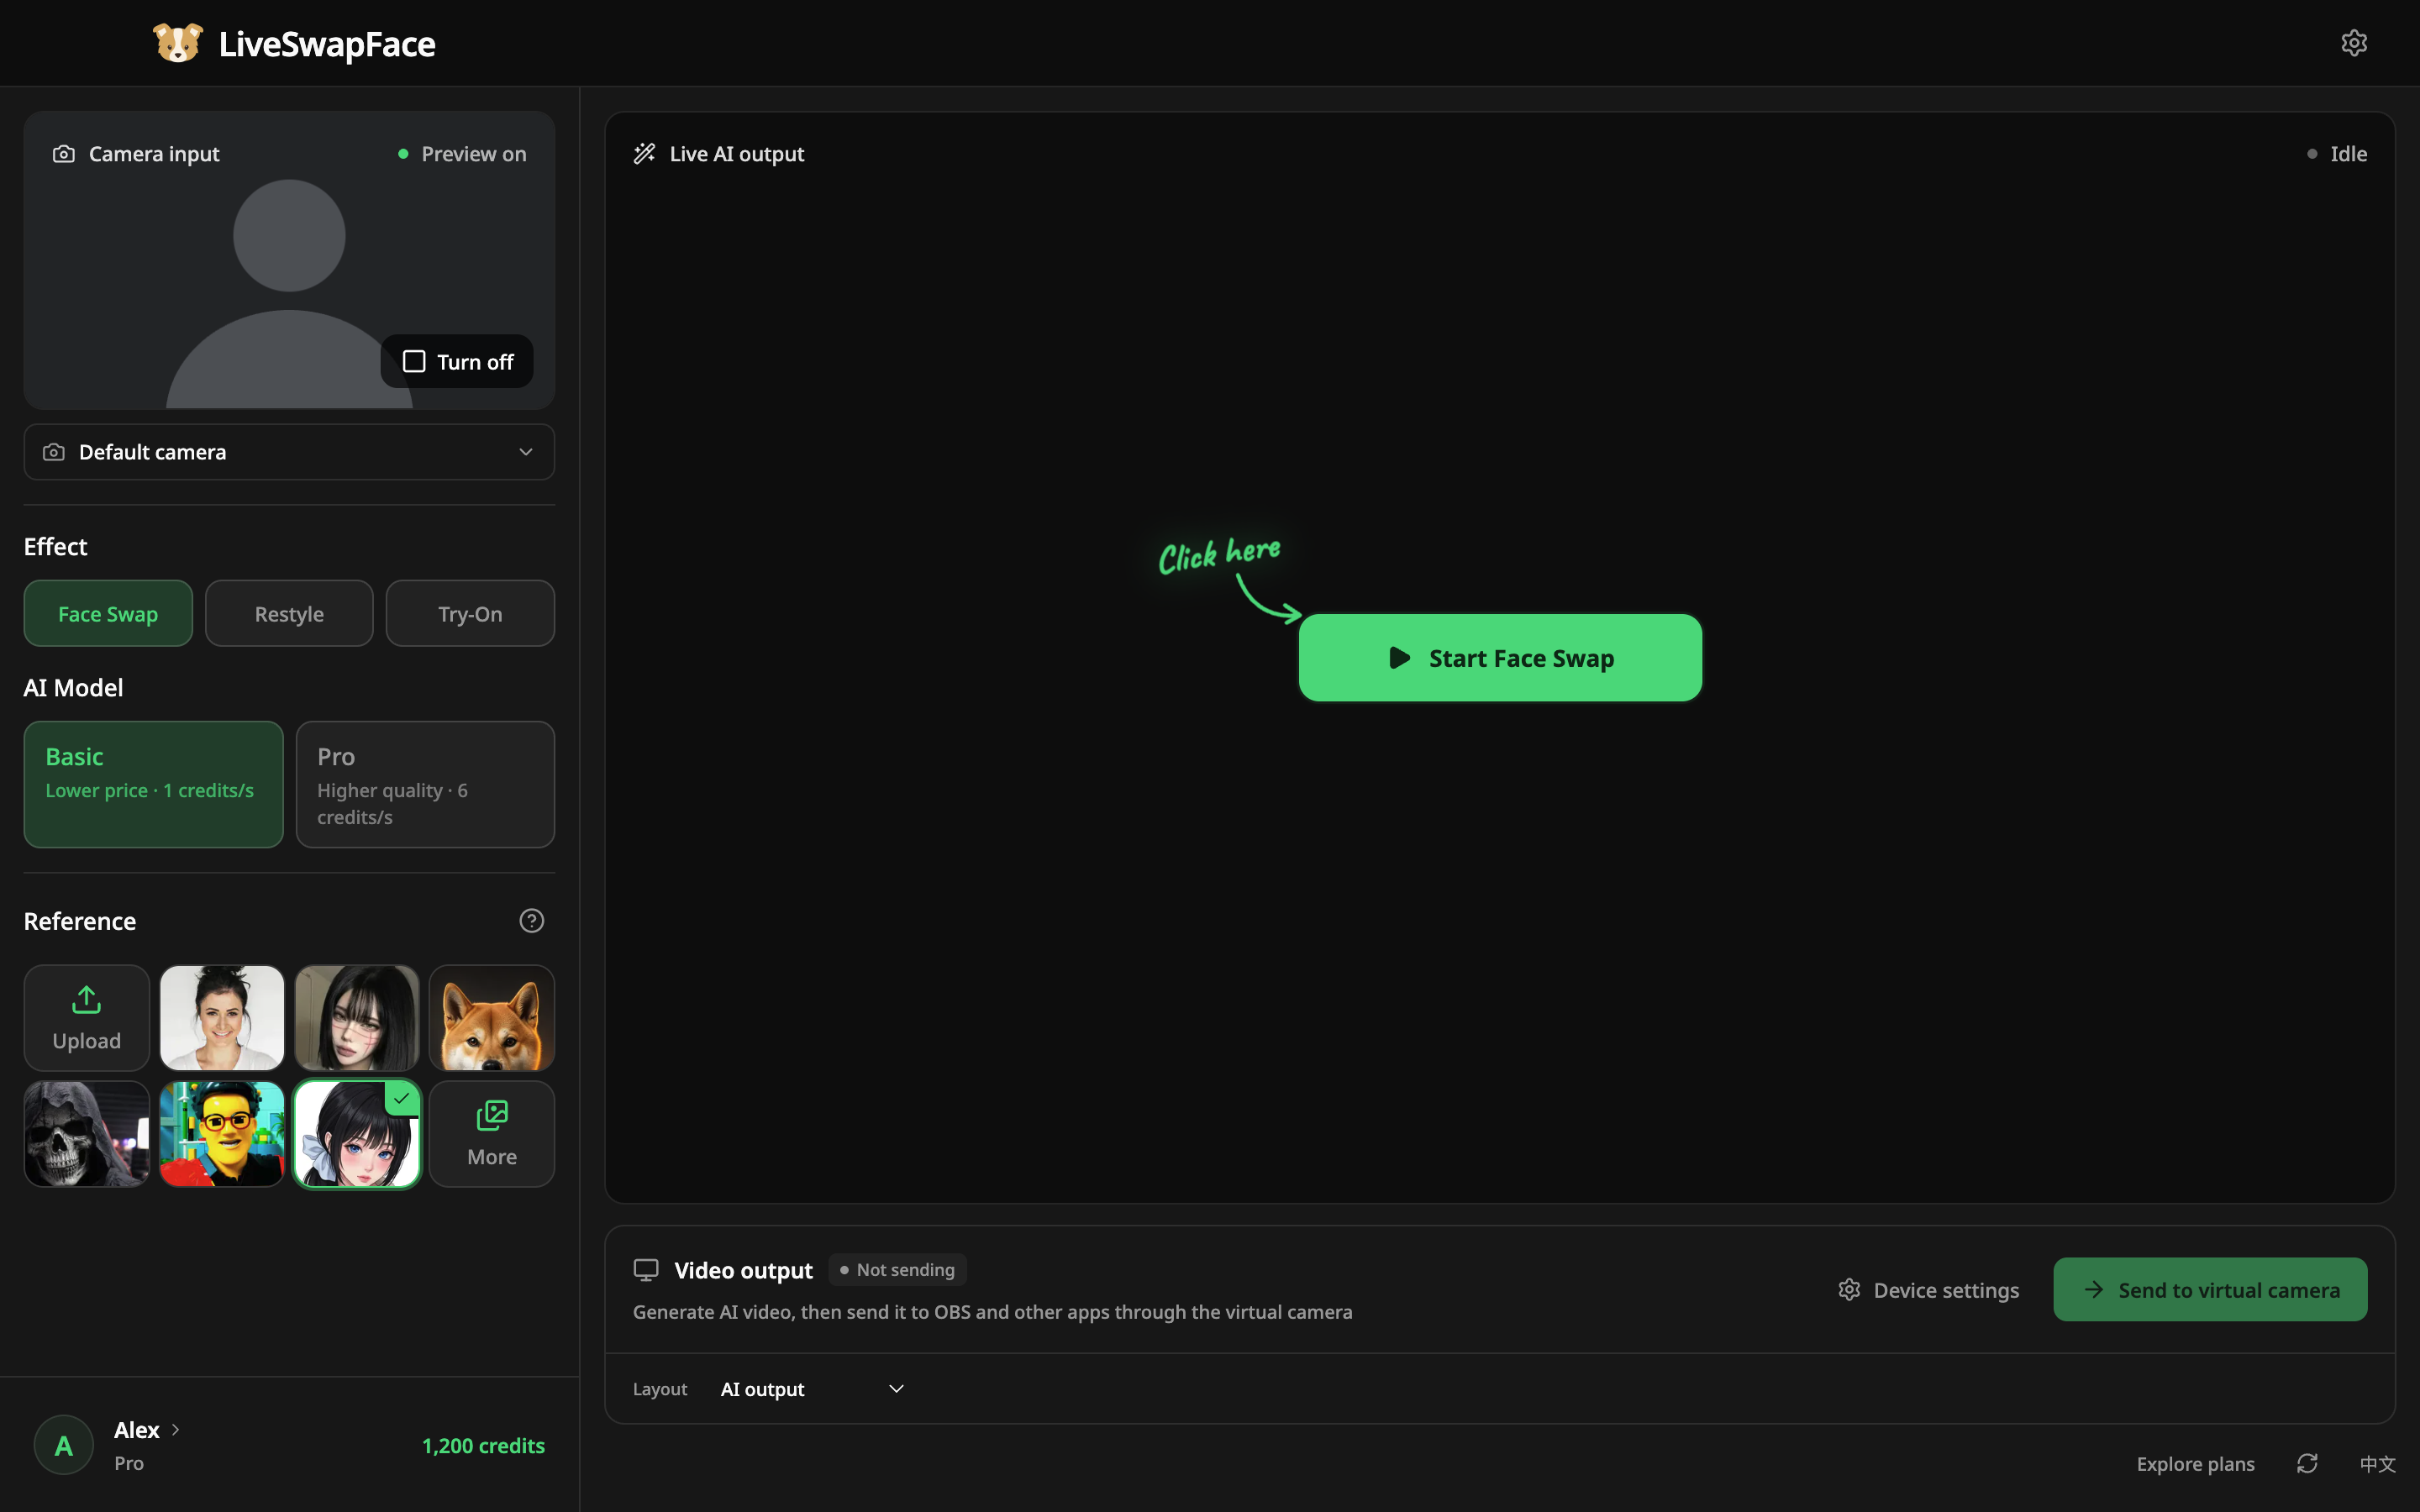
In the app, choose an effect (Face Swap, Restyle or Try-On), pick your reference image and check the preview from your physical webcam. Press Start.
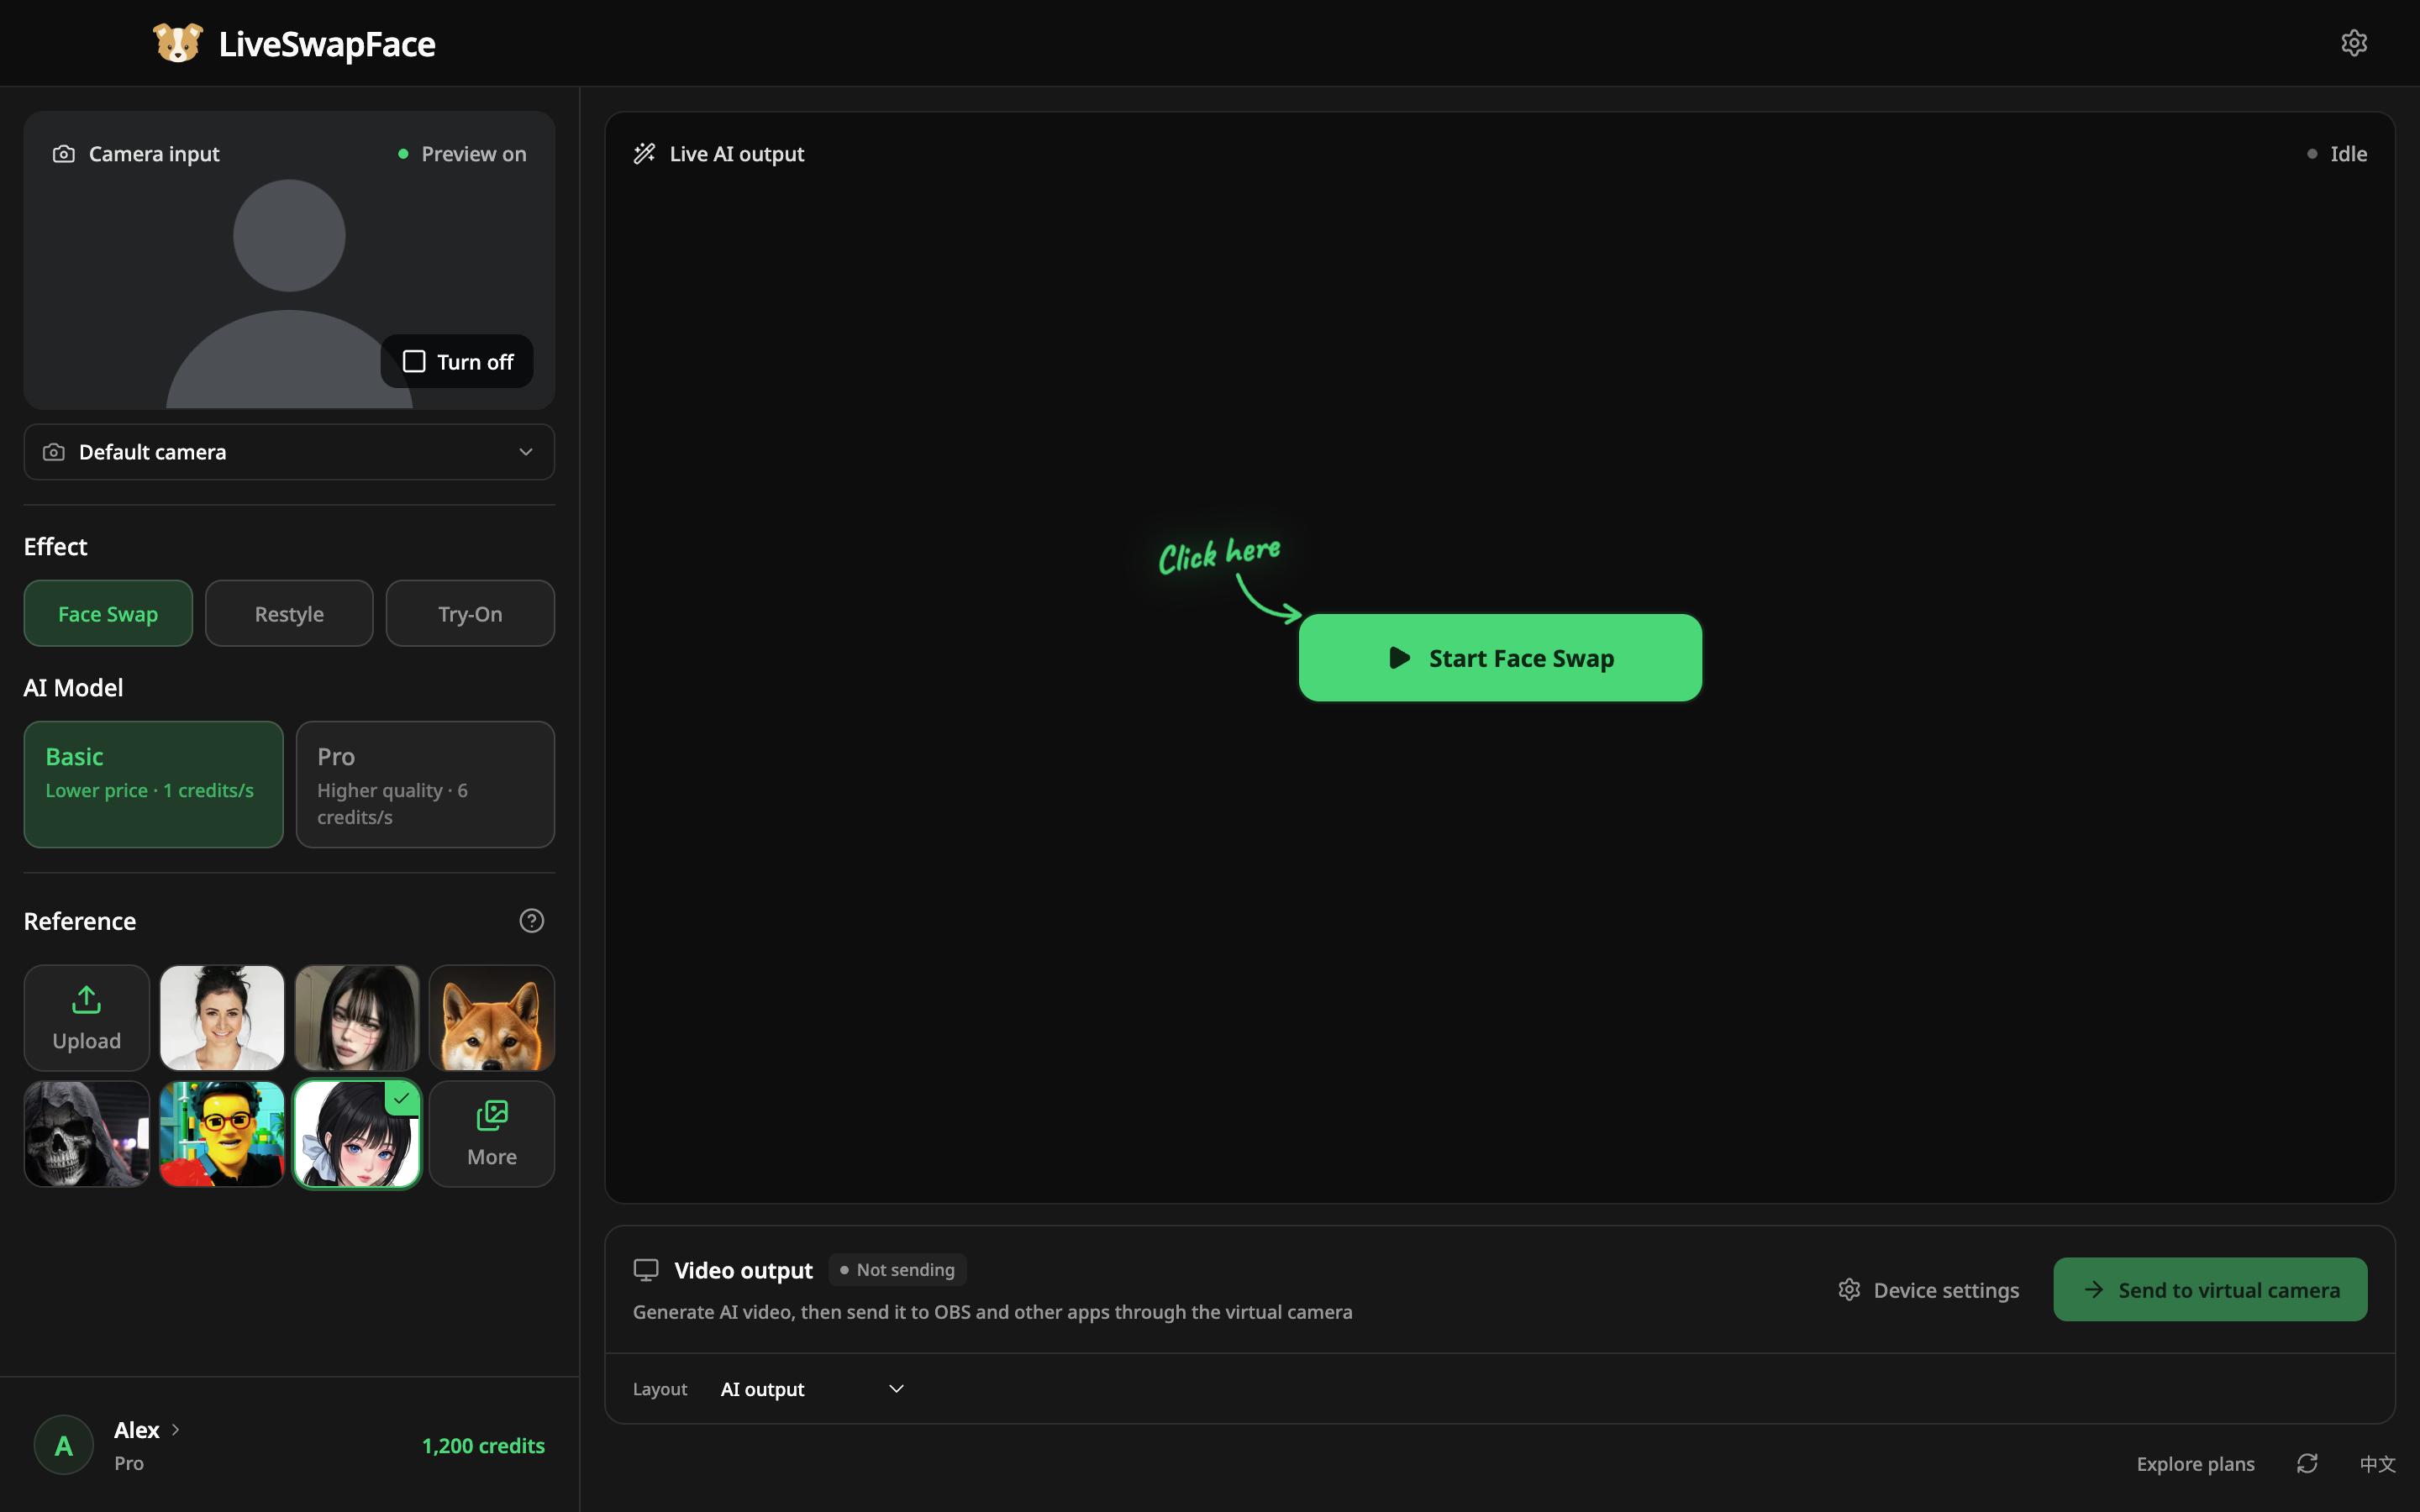
When the AI video appears, click Send to virtual camera. Until you press it, LiveSwapFace Camera is already in the device list but has no picture to send. Once it is sending, the status next to Video output changes from Not sending to Sending.
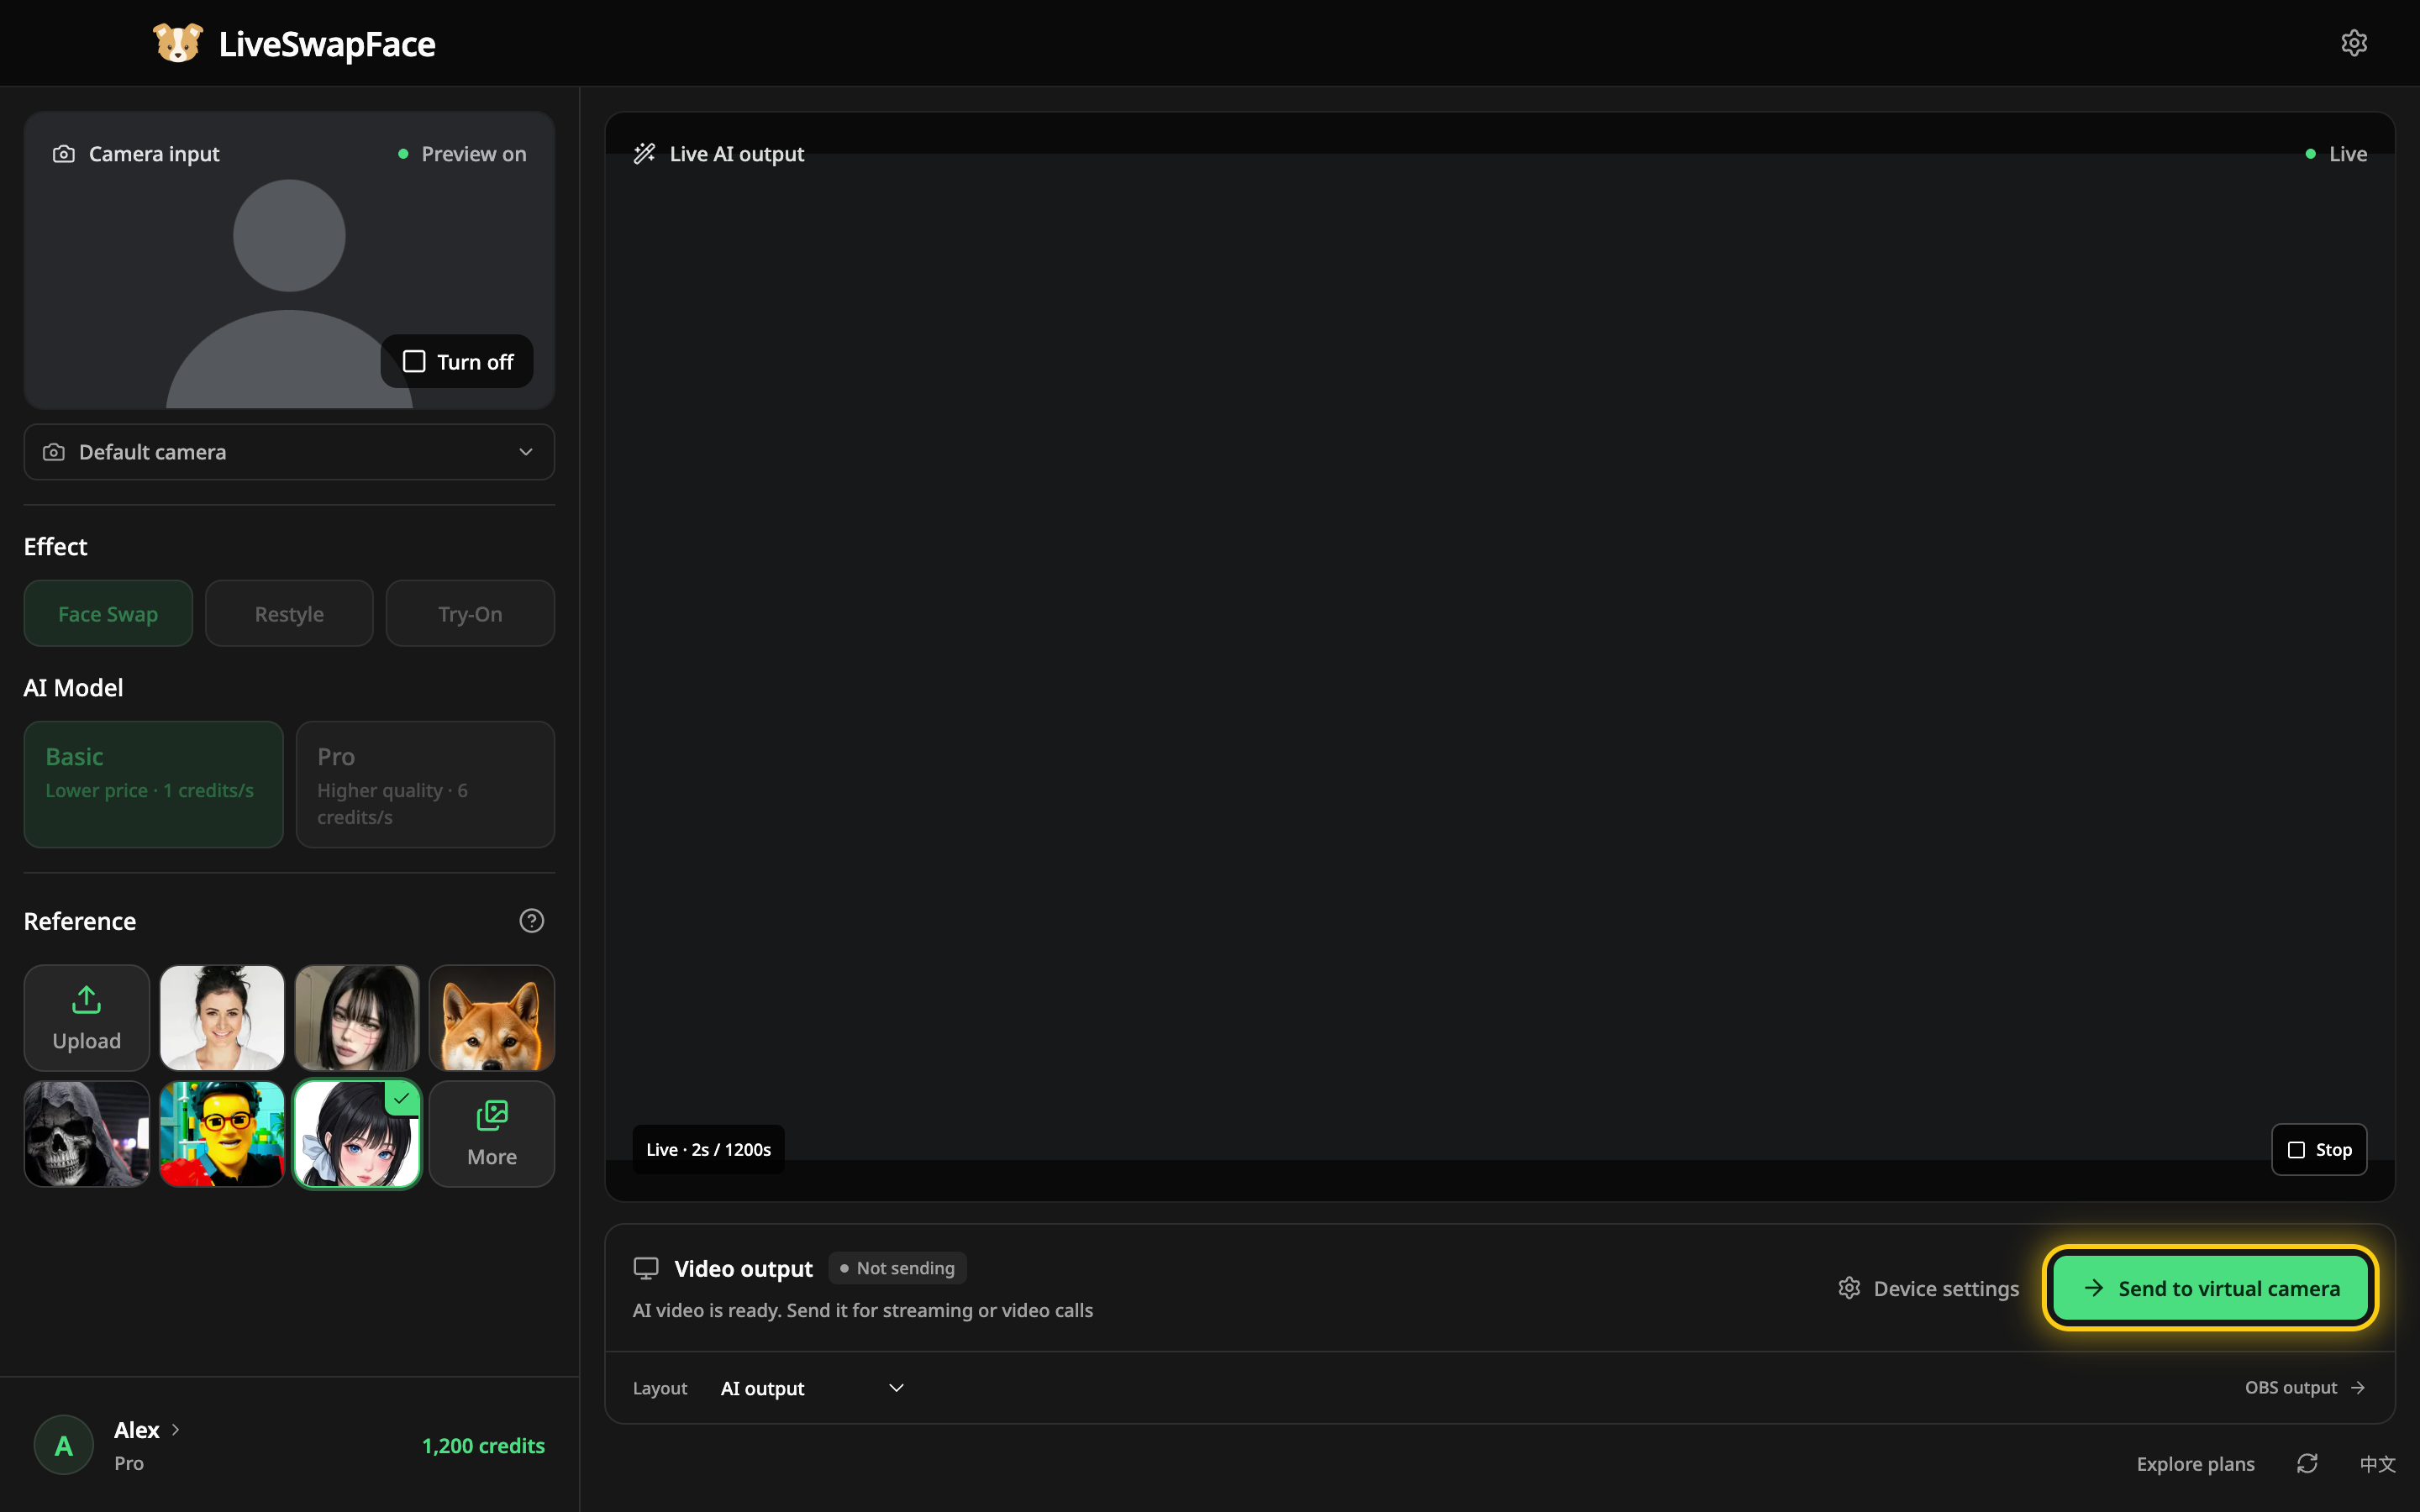
Below the button, Layout decides what the camera sends:
- AI output. Only the generated video. This is the usual choice for a stream.
- Picture in picture. The AI video with a small preview of your real camera in the corner.
- Compare. Your camera and the AI video side by side, good for a "before and after" moment or a tutorial.
Step 4: Add LiveSwapFace Camera in OBS
- In OBS, click + under Sources and choose Video Capture Device.
- Select Create new, name it something like "AI Face" and click OK.
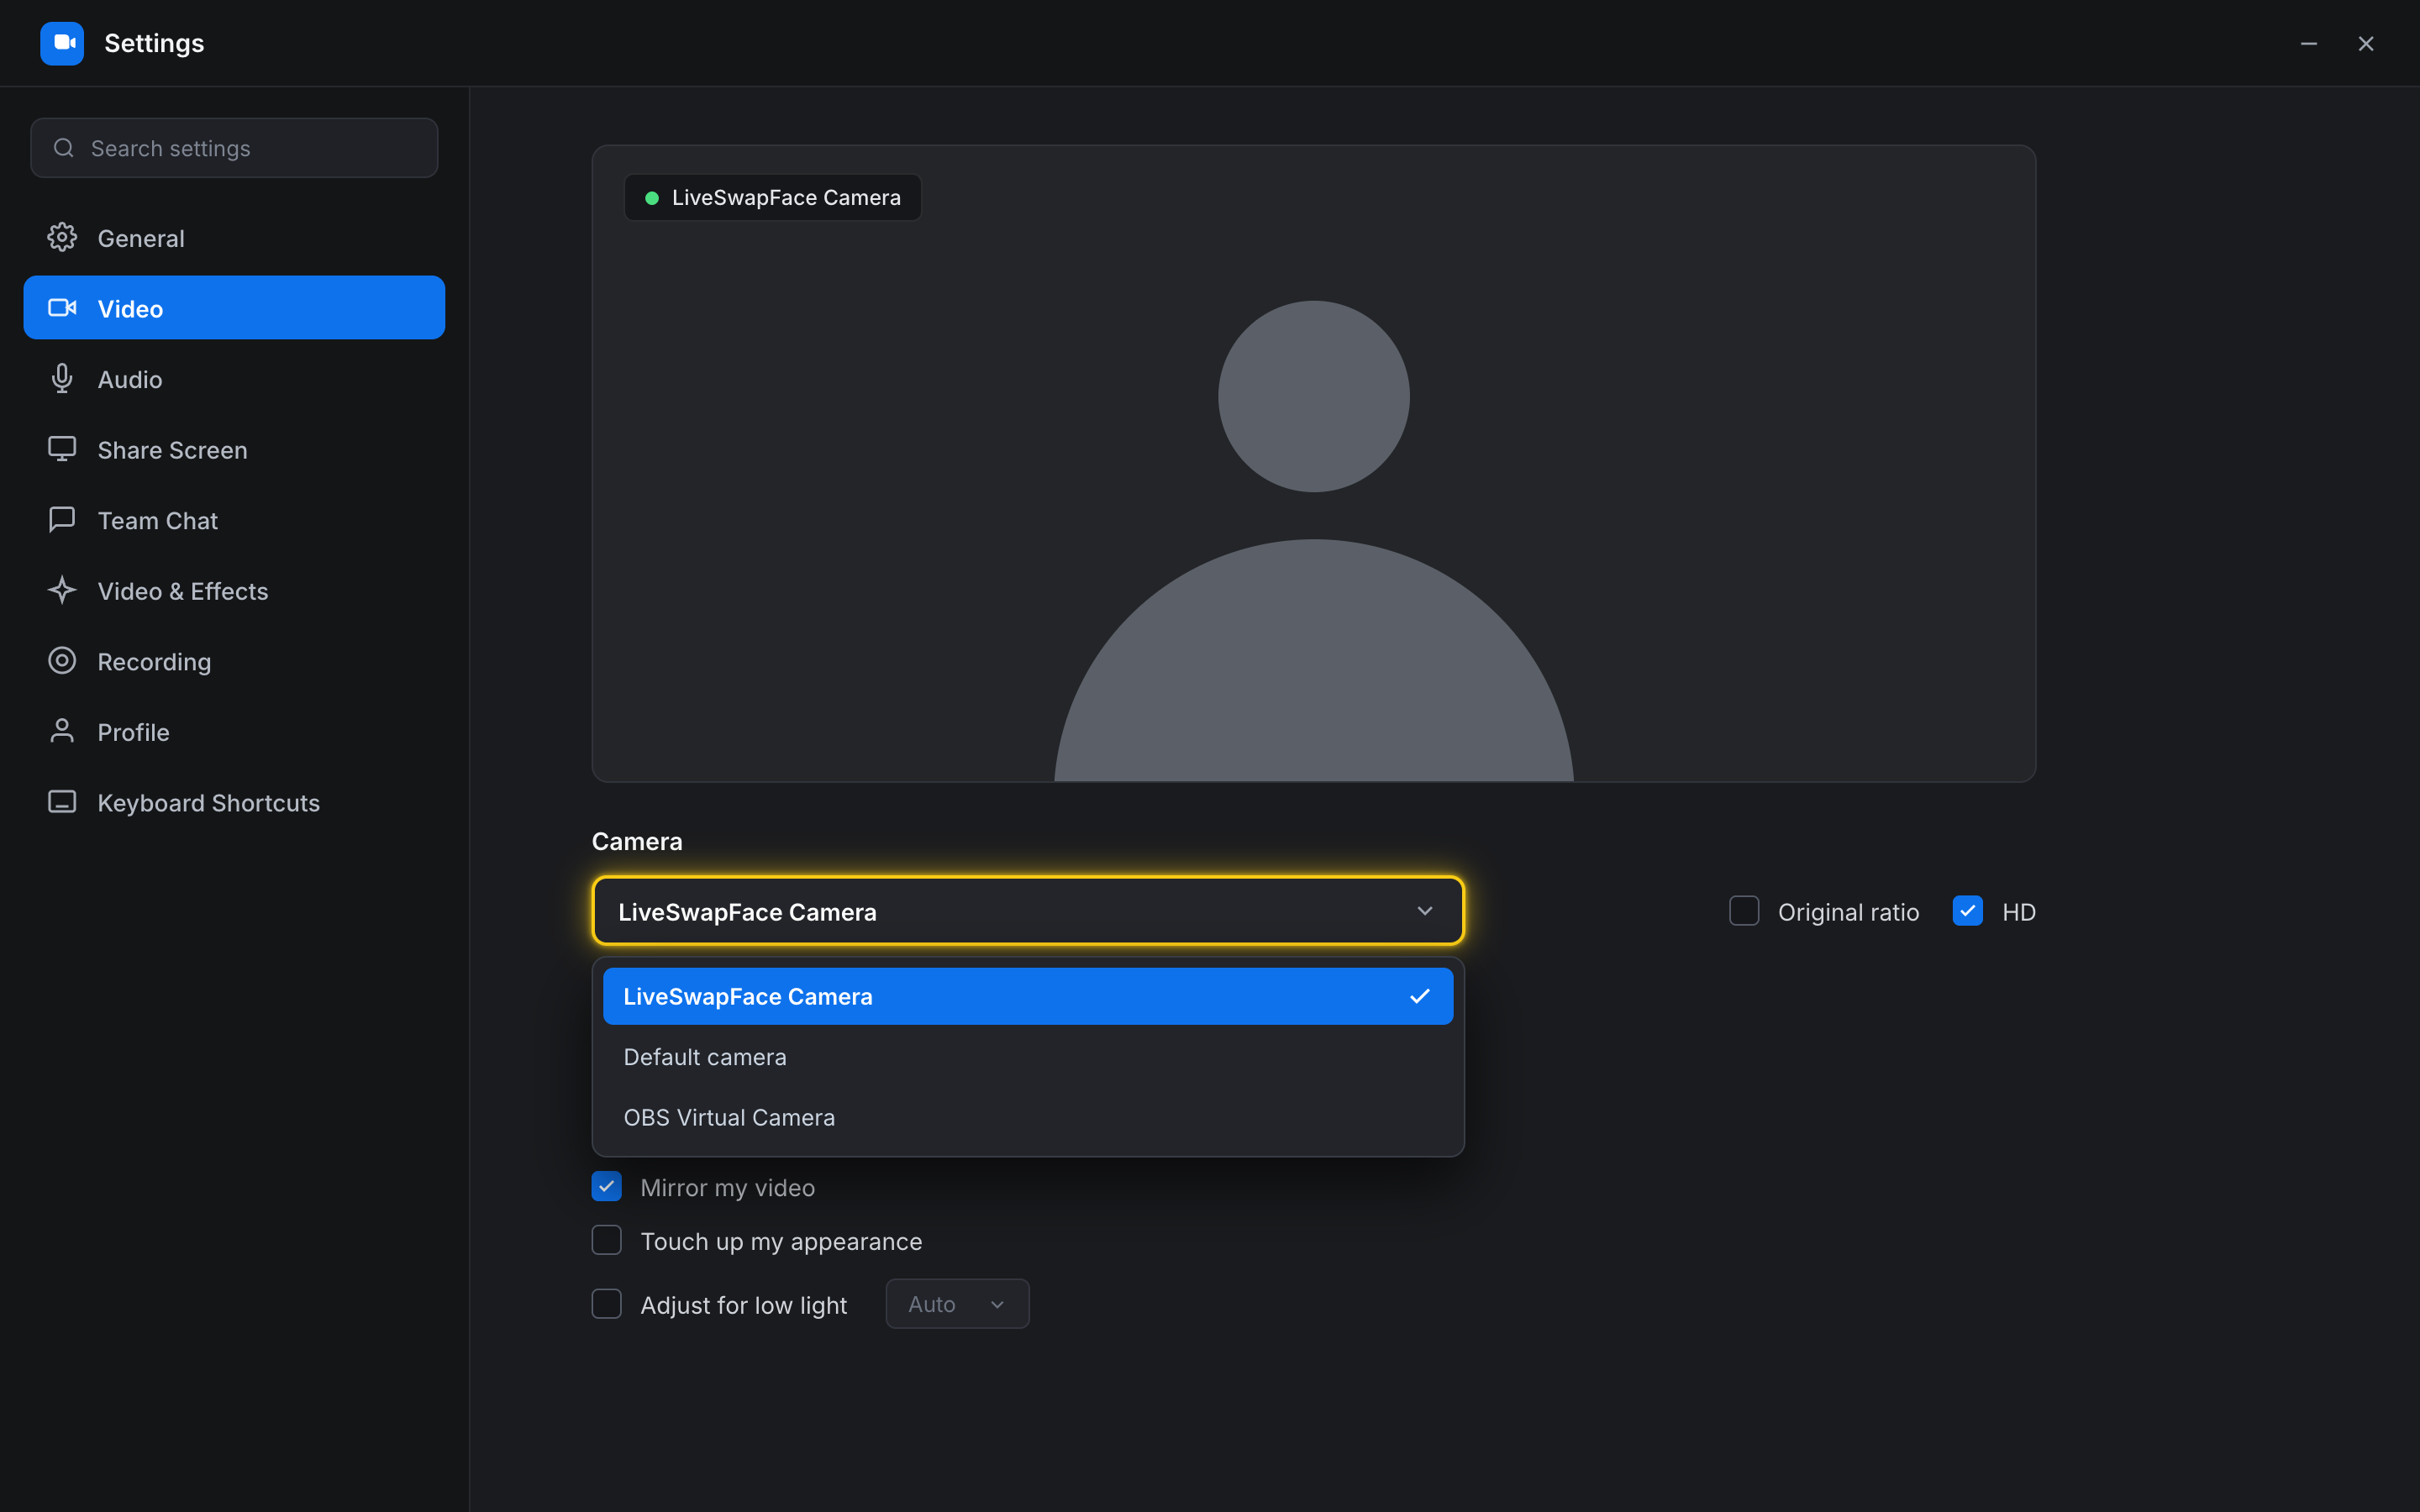
- Under Device, pick LiveSwapFace Camera.
- Click OK, then right-click the source and choose Transform → Fit to screen for a full-frame camera, or drag it into a corner for a facecam over gameplay.
That completes the video side of your face swap for OBS.
The desktop app is already reading your physical webcam, and on Windows many webcams can be used by only one program at a time. If any scene still has an old Video Capture Device pointed at the real webcam, delete it, or open its properties and tick Deactivate when not showing before you hide it. Hiding the source alone is not enough, because that option is off by default and OBS keeps the camera open while the source is hidden.
Step 5: Line Up Your Voice With Your Face
Your microphone goes straight into OBS, while your video makes a round trip to the cloud first. The LiveSwapFace app never touches your microphone, so you set up audio in OBS as usual and delay it slightly so your lips match your words.
Open Edit → Advanced Audio Properties and find your mic's Sync Offset (ms) box. A positive number delays the sound. To find the right value, record ten seconds of yourself clapping, step through the recording frame by frame, and adjust the offset until the sound lands on the frame where your hands meet. Small steps of 20 to 30 ms make this quick.
Scene Ideas for Your Stream
Once the face swap for OBS is a normal camera source, you can build scenes around it like any other source:
- Just Chatting. The AI face fills the screen, with your chat and alerts on top.
- Gameplay corner cam. The AI face sits in a small box over the game, cropped to head and shoulders.
- Character segment. A separate scene with a different reference photo for a recurring bit, such as a game villain who reads the donation messages.
- Art-style break. A Restyle scene that turns your camera into an anime frame for an intro or a "be right back" screen.
- Outfit reveal. A Try-On scene for a cosplay or holiday-themed stream.
Give each scene a hotkey in Settings → Hotkeys, and you can switch between them without leaving your game.
When the Camera Doesn't Show Up
If your face swap for OBS shows a black source, or LiveSwapFace Camera is missing from the Device list, work through these in order:
- Check the app. The camera must be enabled in the app, and the effect must be running with Send to virtual camera turned on.
- Check Windows privacy settings. Go to Settings → Privacy & security → Camera and allow desktop apps to access your camera.
- Restart OBS. If you enabled the camera while OBS was already open, close OBS, open it again and select the device again.
- Free the webcam. Close other programs that might be holding your physical webcam, such as a video call app left open in the background, and delete any OBS source that still points at the real webcam.
Taking It Beyond OBS
The same camera appears in other apps that let you pick a video source, including Zoom and Discord, so you can select LiveSwapFace Camera there directly. If you would rather send your whole OBS scene, overlays included, into a call, click Start Virtual Camera in OBS and choose OBS Virtual Camera in the other app.
To keep a copy of a stream or make short clips, record in OBS. The recording captures the AI face exactly as your viewers saw it, which makes it easy to cut highlights later.
Want to see the effect before installing anything? The web version runs the same live face swap in your browser with the same account.
Conclusion
Most of this face swap for OBS setup happens only once. After that, a stream starts the same way every time: open the app, press Start, click Send to virtual camera, and the AI face is already waiting in your OBS scenes.
Author